MacOS에서 OCI8 설치하는 방법에 대해서 알아보겠습니다.
El Capitan 이후 버전에서는 다음 설정을 해주어야 설치가 됩니다.
- Restart your Mac.
- Before OS X starts up, hold down Command-R and keep it held down until you see an Apple icon and a progress bar. Release. This boots you into Recovery.
- From the Utilities menu, select Terminal.
- At the prompt type exactly the following and then press Return: csrutil disable
- Terminal should display a message that SIP was disabled.
- From the menu, select Restart.
일단은 아래 사이트에서 밑에 3가지 파일을 다운 받습니다.
instantclient-basic-macos.x64–11.2.0.3.0.zip
instantclient-sqlplus-macos.x64–11.2.0.3.0.zip
instantclient-sdk-macos.x64–11.2.0.3.0.zip
그 다음 터미널에서 unzip 명령을 써서 압축을 풀어줍니다.
$ unzip instantclient-sdk-macos.x32–11.2.0.4.0.zip
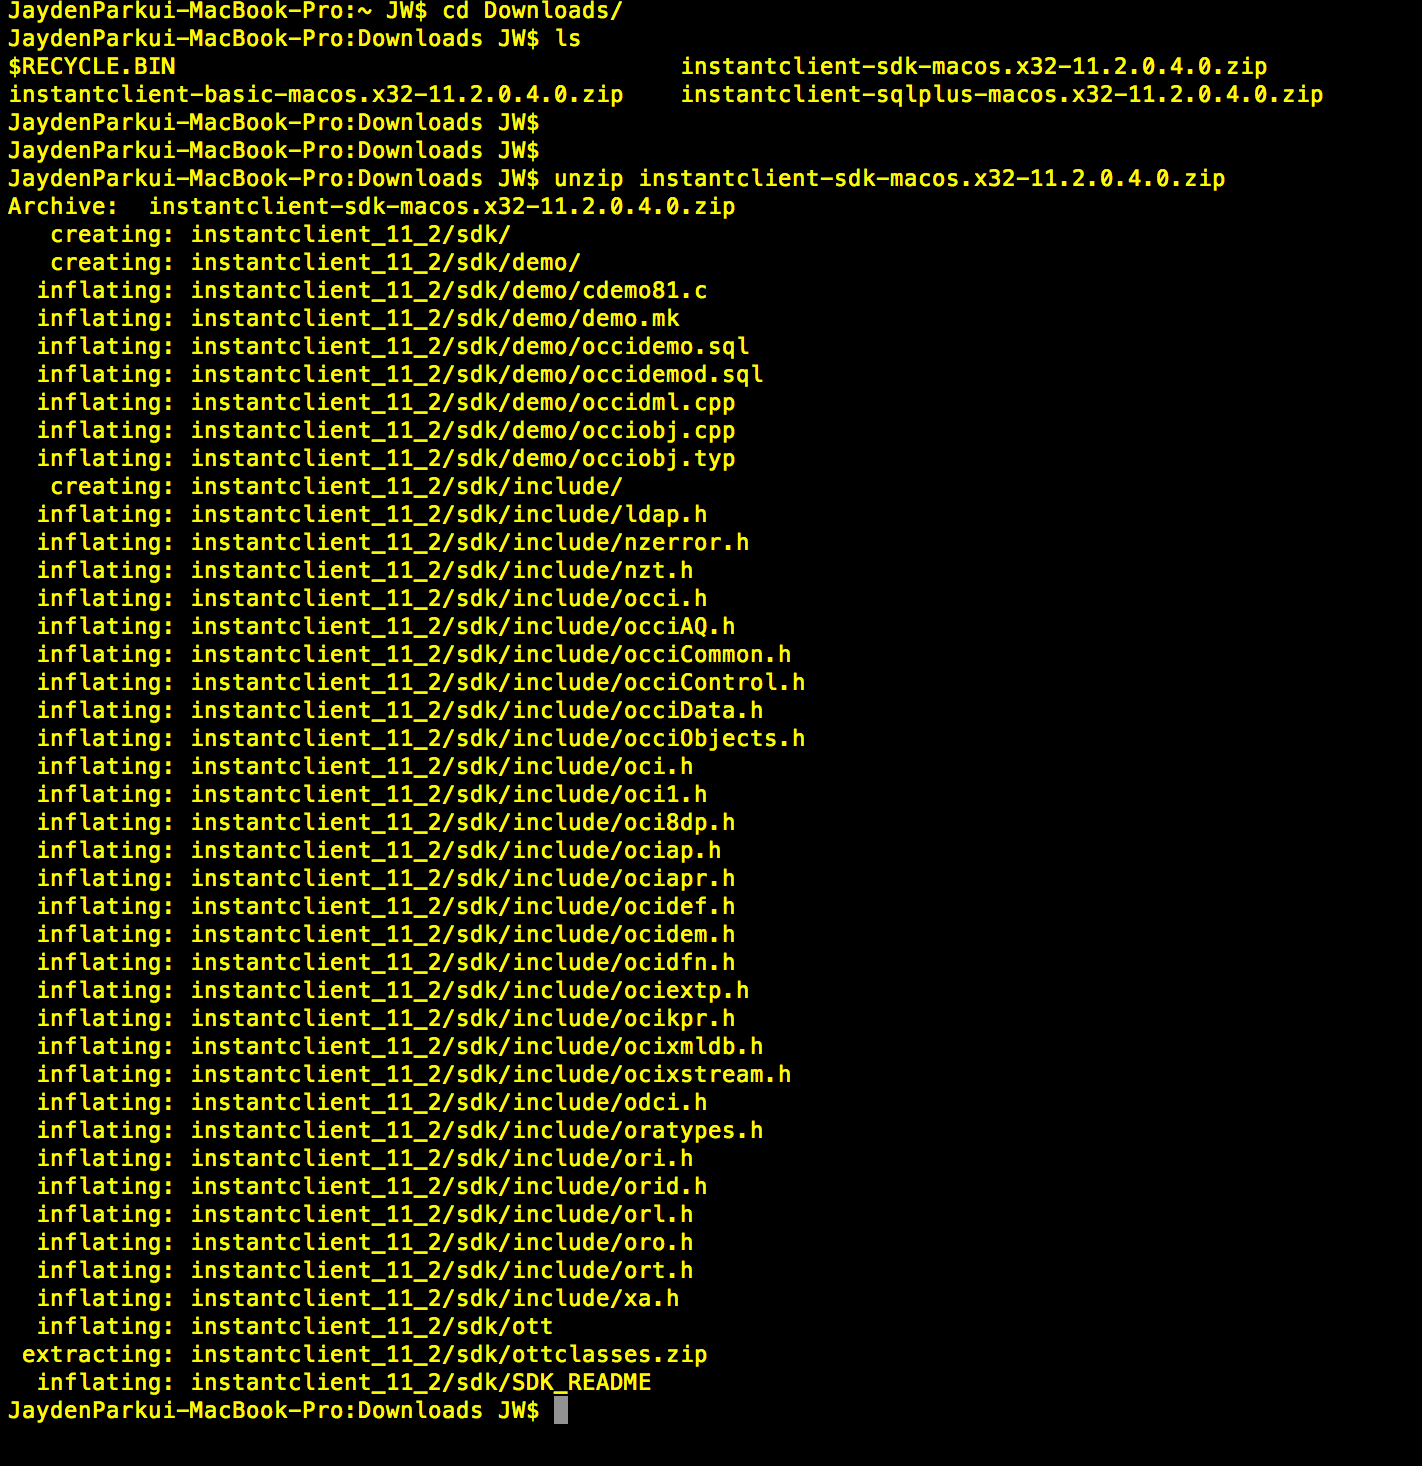
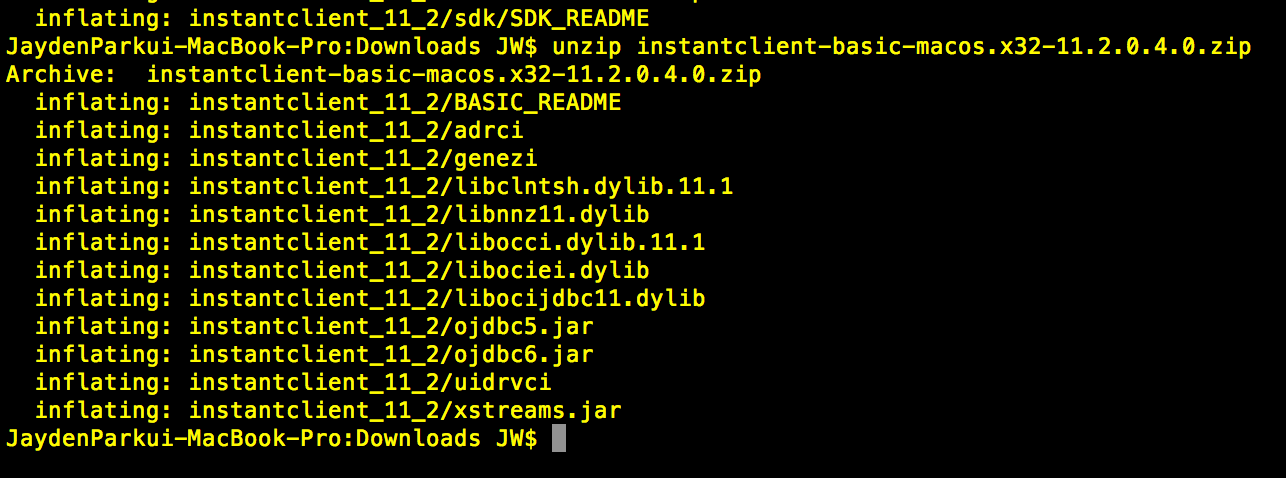

이렇게 다 풀고 나면 각각 폴더가 생기는 것이 아니라 하나의 폴더에 들어갑니다.

Directory Name : instantclient_11_2
그 다음 /usr/local에 oracle 디렉토리를 만들고 위에서 생성된 ‘instantclient_11_2’를 oracle 밑에 이동시켜줍니다.
$ mkdir /usr/local/oracle
$ mv instantclient_11_2 /usr/local/oracle
그 다음 문서에서 처럼 심볼릭 링크를 잡아주어야 합니다.
(Tip : 여기서 /usr/local/oracle/instantclient_11_2/ 는 위에서 설정한 부분입니다.)
$ ln -sf /usr/local/oracle/instantclient_11_2/sdk/include/*.h /usr/local/include/
$ ln -sf /usr/local/oracle/instantclient_11_2/sqlplus /usr/local/bin/
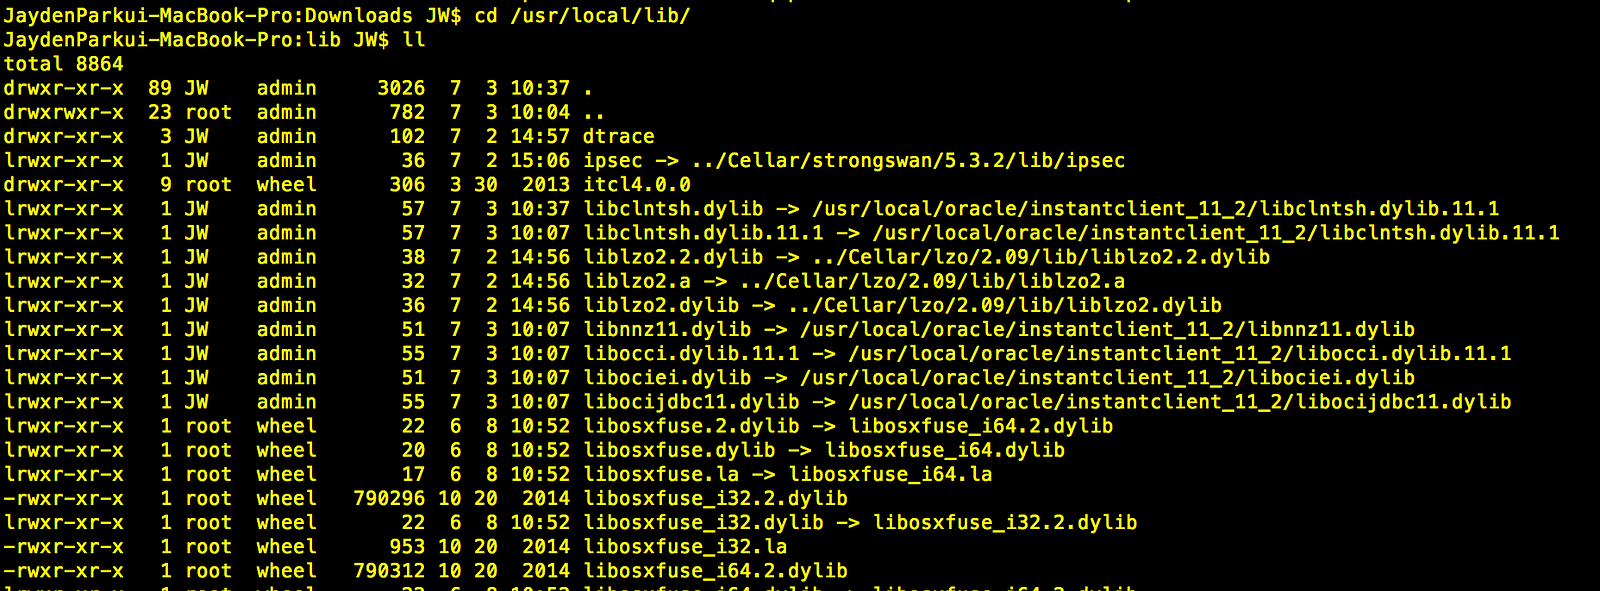
$ ln -sf /usr/local/oracle/instantclient_11_2/*.dylib /usr/local/lib/
$ ln -sf /usr/local/oracle/instantclient_11_2/*.dylib.11.1 /usr/local/lib/
$ ln -sf /usr/local/oracle/instantclient_11_2/libclntsh.dylib.11.1 /usr/local/lib/libclntsh.dylib
이렇게 한 다음 각 링크를 건 곳에 들어가면 다음과 같이 심볼릭 링크가 걸린것을 볼 수 있습니다.
일단 여기까지가 중요합니다!!! (이 부분까지 확실히 해 주어야 합니다) 그 다음 oci8 설치를 위해서 ‘pecl’이라는 명령어가 필요한데 이를 위해서 먼저 perl 부터 설치해주어야 합니다. perl 설치는 다음을 따라서 합니다.(터미널에서)
$ pear version (우선 pear이 있는지 체크)
$ cd /usr/local
$ curl -O http://pear.php.net/go-pear.phar
(여기서 만약 Permission Denied 에러가 뜨면 아래와 같이 sudo를 붙인다)
$ sudo curl -O http://pear.php.net/go-pear.phar
$ sudo php -d detect_unicode=0 go-pear.phar (이걸로 인스톨)
설치는 끝났고 Profile에 PATH를 설정해야 합니다.
(맥같은 경우는 기본적으로 ~/.bash_profile 이 위치입니다.)
$ vi ~/.bash_profile
그 다음 아래 코드를 추가합니다.
export PATH=”/Users/JW/pear/bin:$PATH”
export PATH=”/usr/local/mysql/bin:/Users/JW/pear/bin:$PATH”
그 다음 아래 명령어를 통해서 설치를 마무리 합니다.
$ source ~/.bash_profile (이걸로 새로고침)
$ pear version (이걸로 버젼확인하고)
$ pear upgrade pear (이걸로 업그레이드)
$ pear upgrade (이걸로 업그레이드)
이걸로 pear 설치는 끝났습니다.
.bash_profile 설정 부분 캡쳐
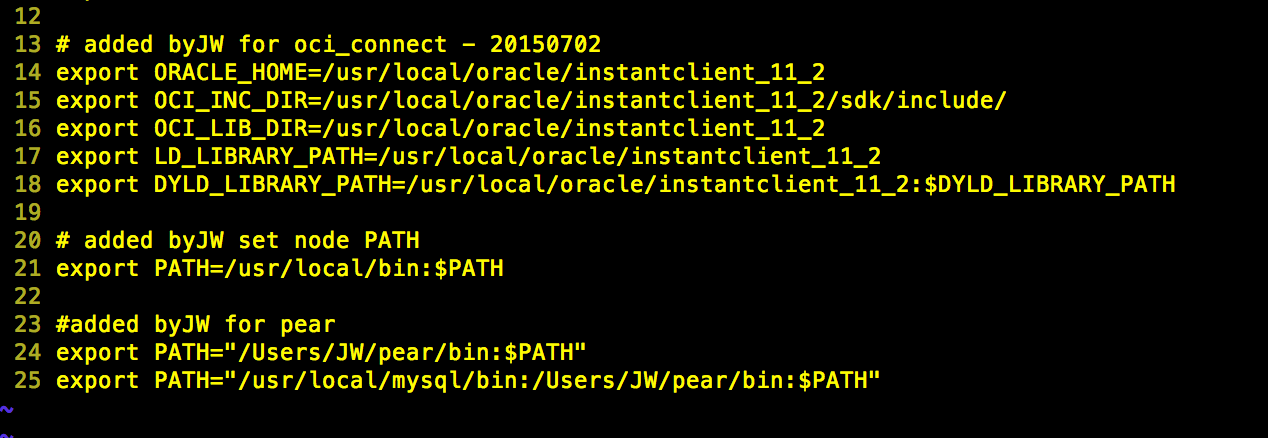
OCI 관련된 부분도 다음과 같이 설정을 해 놓아야 합니다. 아래는 위에 소스를 입력한 부분입니다.
# added byJW for oci_connect — 20150702
export ORACLE_HOME=/usr/local/oracle/instantclient_11_2
export OCI_INC_DIR=/usr/local/oracle/instantclient_11_2/sdk/include/
export OCI_LIB_DIR=/usr/local/oracle/instantclient_11_2
export LD_LIBRARY_PATH=/usr/local/oracle/instantclient_11_2
export DYLD_LIBRARY_PATH=/usr/local/oracle/instantclient_11_2:$DYLD_LIBRARY_PATH
# added byJW set node PATH
export PATH=/usr/local/bin:$PATH
#added byJW for pear
export PATH=”/Users/JW/pear/bin:$PATH”
export PATH=”/usr/local/mysql/bin:/Users/JW/pear/bin:$PATH”
위까지가 준비 과정입니다. (준비가 안되면 다 지우고 다시 해야하는 문제가 발생합니다)
이 부분부터 실제 OCI8 설치 (with pecl)
아래 명령어를 치면 설치가 시작됩니다.
$ sudo pecl install oci8
중간에 ‘if you’re compiling with Oracle Instant Client [autodetect] :’ 라고 나오면
instantclient,/usr/local/lib
이라고 입력하고 엔터를 치면 설치가 시작됩니다.
만약 auto_configure 관련된 에러가 나오면
$ brew install autoconf
brew를 이용해서 설치를 해줍니다. (만약 brew가 설치가 안되어있으면 먼저 설치를 해야합니다)
그럼 다음과 같이 설치 끝
정말 마지막으로 php.ini에
extension=oci8.so
를 추가해주면 정말로 끝이 납니다.
참고사이트
https://gist.github.com/gido/5237100 http://coolestguidesontheplanet.com/installing-pear-osx-10-9-mavericks-osx10-810-7/ http://dummy.pe.kr/1696