Express는 웹 및 모바일 애플리케이션을 위한 일련의 강력한 기능을 제공하는 간결하고 유연한 Node.js 웹 애플리케이션 프레임워크입니다.
자료출처: http://expressjs.com
NPM Express 환경설정 및 설치
$ mkdir MyApp
$ cd MyApp
$ npm init
This utility will walk you through creating a package.json file.
It only covers the most common items, and tries to guess sensible defaults.

See `npm help json` for definitive documentation on these fields
and exactly what they do.

Use `npm install <pkg>` afterwards to install a package and
save it as a dependency in the package.json file.

Press ^C at any time to quit.
package name: (myapp)
version: (1.0.0)
description:
entry point: (index.js)
test command:
git repository:
keywords:
author:
license: (ISC)
About to write to /Users/jungwoon/MyApp/package.json:

{
  "name": "myapp",
  "version": "1.0.0",
  "description": "",
  "main": "index.js",
  "scripts": {
    "test": "echo \"Error: no test specified\" && exit 1"
  },
  "author": "",
  "license": "ISC"
}


Is this ok? (yes) yes
$ npm install express --save # 실제 express 설치하는 부분
기본 예제
// app.js

var express = require('express');
var app = express();

// 주소가 '/' 최상위 URL로 들어오면 Hello World를 보낸다
// ex) http://localhost:3000 이면 최상위 URL은 http://localhost:3000/
app.get('/', function (req, res) {
  res.send("<h1>Hello World</h1>"); // HTML이 들어가도 됨
});

// 3000번 포트로 들어오면 열어주는 부분
app.listen(3000, function () {
  console.log('Example app listening on port 3000!');
});
위에 만든 파일을 실행시키려면 터미널에서 node app.js 를 입력한다
$ node app.js
Example app listening on port 3000! # 위에 console.log에서 찍어준 문자열이 다음과 같이 찍
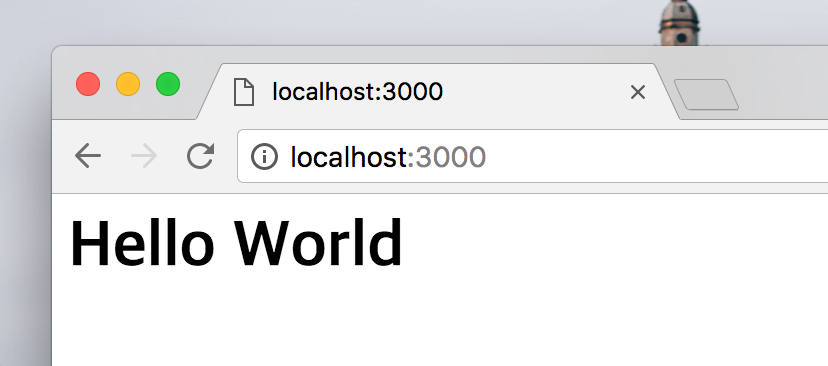
그 다음 브라우저를 열고 아래와 같이 3000번 포트로 들어가면 위에서 명시한 res.send("<h1>Hello World</h1>"); 을 통해서
받은 <h1>Hello World</h1>이 보여집니다
기본 라우팅
라우팅은 URI(또는 경로) 및 특정한 HTTP 요청 메소드(GET, POST 등)인 특정 엔드포인트에 대한 클라이언트 요청에 애플리케이션이 응답하는 방법을 결정하는 것을 말합니다. 각 라우트는 하나 이상의 핸들러 함수를 가질 수 있으며, 이러한 함수는 라우트가 일치할 때 실행됩니다. 라우트 정의에는 다음과 같은 구조가 필요합니다.
app.[METHOD]([PATH], [HANDLER])
위의 예제에서
- app은 위에서
var app = express();로 명시한 express의 인스턴스입니다. - METHOD는 HTTP 요청 메소드입니다.
- GET
- POST
- POST
- PUT
- DELETE
- PATH는 서버에서의 경로(=URL)입니다.
- HANDLER는 라우트가 일치할 때 실행되는 함수입니다.
기본 라우팅 예제
홈 페이지에서 GET 요청에 응답:
app.get('/', function (req, res) {
  res.send('Hello World!');
});
애플리케이션의 홈 페이지인 루트 라우트(/)에서 POST 요청에 응답:
app.post('/', function (req, res) {
  res.send('Got a POST request');
});
/user 라우트에 대한 PUT 요청에 응답:
app.put('/user', function (req, res) {
  res.send('Got a PUT request at /user');
});
/user 라우트에 대한 DELETE 요청에 응답:
app.delete('/user', function (req, res) {
  res.send('Got a DELETE request at /user');
});
라우트 핸들러
미들웨어와 비슷하게 작동하는 여러 콜백 함수를 제공하여 요청을 처리할 수 있습니다. 유일한 차이점은 이러한 콜백은 next(‘route’)를 호출하여 나머지 라우트 콜백을 우회할 수도 있다는 점입니다.
이러한 메커니즘을 이용하면 라우트에 대한 사전 조건을 지정한 후, 현재의 라우트를 계속할 이유가 없는 경우에는 제어를 후속 라우트에 전달할 수 있습니다. 다음 예에 나타난 것과 같이, 라우트 핸들러는 함수나 함수 배열의 형태 또는 둘을 조합한 형태일 수 있습니다.
하나의 콜백 함수는 하나의 라우트를 처리할 수 있습니다. 예를 들면 다음과 같습니다.
app.get('/example/a', function (req, res) {
  res.send('Hello from A!');
});
2개 이상의 콜백 함수는 하나의 라우트를 처리할 수 있습니다(next 오브젝트를 반드시 지정해야 함). 예를 들면 다음과 같습니다.
app.get('/example/b', function (req, res, next) {
  console.log('the response will be sent by the next function ...');
  next();
}, function (req, res) {
  res.send('Hello from B!');
});
하나의 콜백 함수 배열은 하나의 라우트를 처리할 수 있습니다. 예를 들면 다음과 같습니다.
var cb0 = function (req, res, next) {
  console.log('CB0');
  next();
}

var cb1 = function (req, res, next) {
  console.log('CB1');
  next();
}

var cb2 = function (req, res) {
  res.send('Hello from C!');
}

app.get('/example/c', [cb0, cb1, cb2]);
독립적인 함수와 함수 배열의 조합은 하나의 라우트를 처리할 수 있습니다. 예를 들면 다음과 같습니다.
var cb0 = function (req, res, next) {
  console.log('CB0');
  next();
}

var cb1 = function (req, res, next) {
  console.log('CB1');
  next();
}

app.get('/example/d', [cb0, cb1], function (req, res, next) {
  console.log('the response will be sent by the next function ...');
  next();
}, function (req, res) {
  res.send('Hello from D!');
});
응답 메소드 종류
다음 표에 표시된 응답 오브젝트에 대한 메소드(res)는 응답을 클라이언트로 전송하고 요청-응답 주기를 종료할 수 있습니다. 라우트 핸들러로부터 다음 메소드 중 어느 하나도 호출되지 않는 경우, 클라이언트 요청은 정지된 채로 방치됩니다.
| 메소드 | 설명 |
|---|---|
| res.downloaded() | 파일이 다운로드되도록 프롬프트합니다 |
| res.end() | 응답 프로세스를 종료합니다 |
| res.json() | JSON 응답을 전송합니다 |
| res.jsonp() | JSONP 지원을 통해 JSON 응답을 전송합니다 |
| res.redirect() | 요청의 경로를 재지정합니다 |
| res.render() | 템플릿 엔진을 렌더링합니다 |
| res.send() | 다양한 유형의 응답을 전송합니다 |
| res.sendFile() | 파일을 스트림의 형태로 전송합니다 |
| res.sendStatus() | 응답 상태 코드를 설정한 후 해당 코드를 문자열로 표현한 내용을 본문으로 전송합니다 |
app.route()
app.route()를 이용하면 라우트 경로에 대하여 체인 가능한 라우트 핸들러를 작성할 수 있습니다. 경로는 한 곳에 지정되어 있으므로, 모듈식 라우트를 작성하면 중복성과 오타가 감소하여 도움이 됩니다.
라우트에 대한 자세한 정보는 Router() 문서를 참조하십시오.
app.route('/book')
  .get(function(req, res) {
    res.send('Get a random book');
  })
  .post(function(req, res) {
    res.send('Add a book');
  })
  .put(function(req, res) {
    res.send('Update the book');
  });
express.Router
express.Router 클래스를 사용하면 모듈식 마운팅 가능한 핸들러를 작성할 수 있습니다. Router 인스턴스는 완전한 미들웨어이자 라우팅 시스템이며, 따라서 “미니 앱(mini-app)”이라고 불리는 경우가 많습니다.
다음 예에서는 라우터를 모듈로서 작성하고, 라우터 모듈에서 미들웨어 함수를 로드하고, 몇몇 라우트를 정의하고, 기본 앱의 한 경로에 라우터 모듈을 마운트합니다.
다음의 내용이 입력된 birds.js라는 이름의 라우터 파일을 앱 디렉토리에 작성하십시오.
var express = require('express');
var router = express.Router();

// middleware that is specific to this router
router.use(function timeLog(req, res, next) {
  console.log('Time: ', Date.now());
  next();
});
// define the home page route
router.get('/', function(req, res) {
  res.send('Birds home page');
});
// define the about route
router.get('/about', function(req, res) {
  res.send('About birds');
});

module.exports = router;
이후 앱 내에서 다음과 같이 라우터 모듈을 로드하십시오.
var birds = require('./birds');
app.use('/birds', birds);
앱은 이제 /birds 및 /birds/about에 대한 요청을 처리할 수 있게 되었으며, 해당 라우트에 대한 특정한 미들웨어 함수인 timeLog를 호출할 것입니다.