Fluentd를 활용하여 Twitter의 Feed를 PubSub으로 보내기
성공 했었던 실습환경
Mechine Type : n1-standard-1(vCPU 1개 3.75GB 메모리)
Region : asia-east-1-a
OS : Ubuntu 14.04 LTS
ID 및 API 액세스 : 모든 Cloud API에 대한 전체 액세스 허용
방화벽 : HTTP 트래픽 허용, HTTPS 트래픽 허용
이 당시 성공했을때 설치해 놓은 Gem 버전들
*** LOCAL GEMS ***

actionmailer (4.2.8)
actionpack (4.2.8)
actionview (4.2.8)
activejob (4.2.8)
activemodel (4.2.8)
activerecord (4.2.8)
activesupport (4.2.8)
addressable (2.5.2, 2.5.1)
arel (6.0.4)
autoparse (0.3.3)
aws-sdk (2.10.45)
aws-sdk-core (2.10.45)
aws-sdk-resources (2.10.45)
aws-sigv4 (1.0.2)
beefcake (1.2.0)
bigdecimal (default: 1.2.4)
bson (4.1.1)
buftok (0.2.0)
builder (3.2.3)
bundler (1.14.5)
celluloid (0.15.2)
cool.io (1.5.1)
diff-lcs (1.3)
digest-crc (0.4.1)
domain_name (0.5.20170404)
draper (1.4.0)
equalizer (0.0.11)
erubis (2.7.0)
eventmachine (1.2.5)
extlib (0.9.16)
faraday (0.13.1)
fluent-logger (0.7.1)
fluent-mixin-plaintextformatter (0.2.6)
fluent-plugin-buffer-lightening (0.0.2)
fluent-plugin-gcloud-pubsub (0.0.5)
fluent-plugin-kafka (0.6.1)
fluent-plugin-mongo (0.8.1)
fluent-plugin-rewrite-tag-filter (1.5.6)
fluent-plugin-s3 (0.8.5)
fluent-plugin-scribe (0.10.14)
fluent-plugin-td (0.10.29)
fluent-plugin-td-monitoring (0.2.3)
fluent-plugin-twitter (0.6.1)
fluent-plugin-webhdfs (0.7.1)
fluentd (0.14.22, 0.12.40)
fluentd-ui (0.4.4)
font-awesome-rails (4.7.0.1)
gcloud (0.6.3)
globalid (0.4.0)
google-api-client (0.8.7)
googleauth (0.6.1)
haml (4.0.7)
haml-rails (0.5.3)
hike (1.2.3)
hirb (0.7.3)
http (3.0.0)
http-cookie (1.0.3)
http-form_data (2.0.0)
http_parser.rb (0.6.0)
httpclient (2.8.2.4)
i18n (0.8.1)
io-console (default: 0.4.3)
ipaddress (0.8.3)
jbuilder (2.6.3)
jmespath (1.3.1)
jquery-rails (3.1.4)
json (default: 1.8.1)
jwt (2.1.0)
kramdown (1.13.2)
kramdown-haml (0.0.3)
launchy (2.4.3)
little-plugger (1.1.4)
logging (2.2.2)
loofah (2.0.3)
ltsv (0.1.0)
mail (2.6.4)
memoist (0.16.0)
memoizable (0.4.2)
mime-types (3.1, 2.99.3)
mime-types-data (3.2016.0521)
mini_portile2 (2.3.0, 2.1.0)
minitest (5.10.1, default: 4.7.5)
mixlib-cli (1.7.0)
mixlib-config (2.2.4)
mixlib-log (1.7.1)
mixlib-shellout (2.2.7)
mongo (2.2.7)
msgpack (1.1.0)
multi_json (1.12.1)
multipart-post (2.0.0)
naught (1.1.0)
nokogiri (1.8.1)
ohai (6.20.0)
oj (2.18.1)
os (0.9.6)
parallel (1.8.0)
psych (default: 2.0.5)
public_suffix (3.0.0, 2.0.5)
puma (3.8.2)
rack (1.6.5)
rack-test (0.6.3)
rails (4.2.8)
rails-deprecated_sanitizer (1.0.3)
rails-dom-testing (1.0.8)
rails-html-sanitizer (1.0.3)
railties (4.2.8)
rake (default: 10.1.0)
rdoc (default: 4.1.0)
request_store (1.3.2)
retriable (1.4.1)
ruby-kafka (0.4.2)
ruby-progressbar (1.8.3)
ruby_dig (0.0.2)
rubyzip (1.2.1, 1.1.7)
sass (3.2.19)
sass-rails (4.0.5)
serverengine (2.0.5)
settingslogic (2.0.9)
sigdump (0.2.4)
signet (0.8.1)
simple_oauth (0.3.1)
sprockets (2.12.4)
sprockets-rails (2.3.3)
string-scrub (0.0.5)
strptime (0.1.9)
sucker_punch (1.0.5)
systemu (2.5.2)
td (0.15.2)
td-client (0.8.85)
td-logger (0.3.27)
test-unit (default: 2.1.10.0)
thor (0.19.4)
thread_safe (0.3.6)
thrift (0.8.0)
tilt (1.4.1)
timers (1.1.0)
twitter (6.2.0)
tzinfo (1.2.3)
tzinfo-data (1.2017.2)
unf (0.1.4)
unf_ext (0.0.7.4)
uuidtools (2.1.5)
webhdfs (0.8.0)
yajl-ruby (1.3.0)
zip-zip (0.3)
zonefile (1.06)
실습
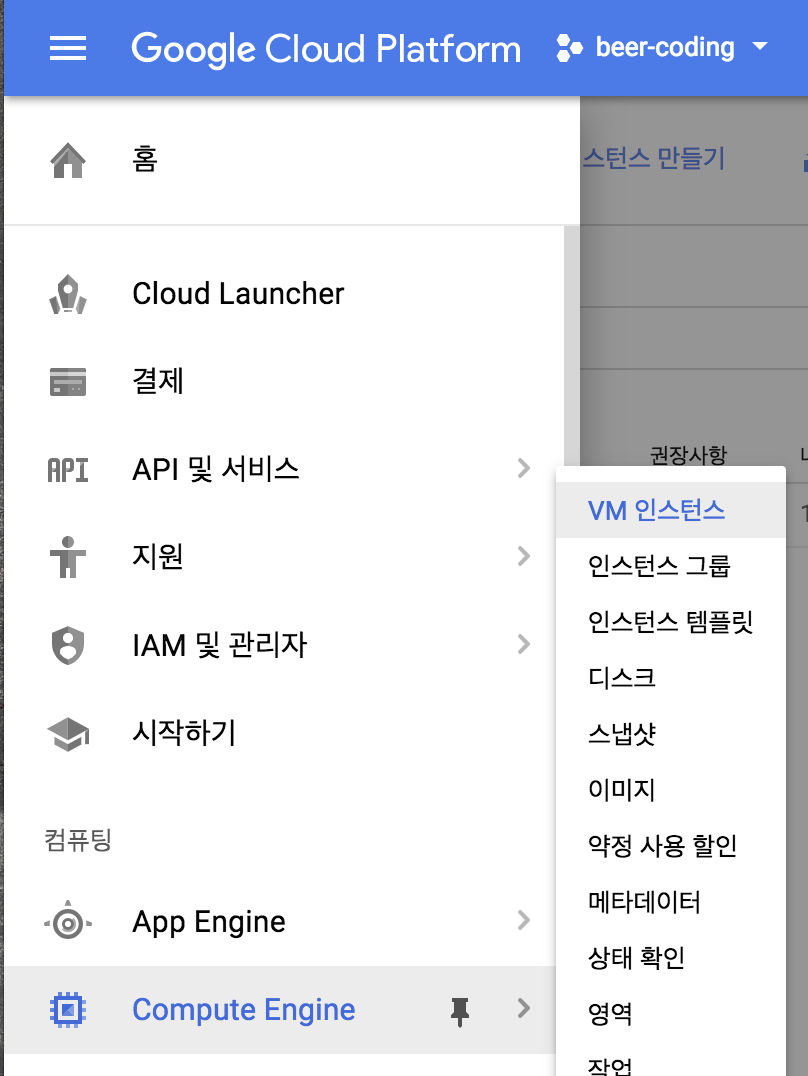
Compute Engine으로 Instance 만들기
Google Cloud Console에 들어가서 메뉴 - Compute Engine을 선택합니다
아래와 같은 화면이 나오면 상단에 ‘인스턴스 만들기’를 선택합니다
그럼 아래와 동일하게 설정을 하고 만들기를 누릅니다
중요하게 볼 부분은
- 부팅 디스크 : Ubuntu 14.04 LTS
- 액세스 범위 : 모든 Cloud API에 대한 전체 액세스 허용
- 방화벽 : HTTP 트래픽 허용, HTTPS 트래픽 허용

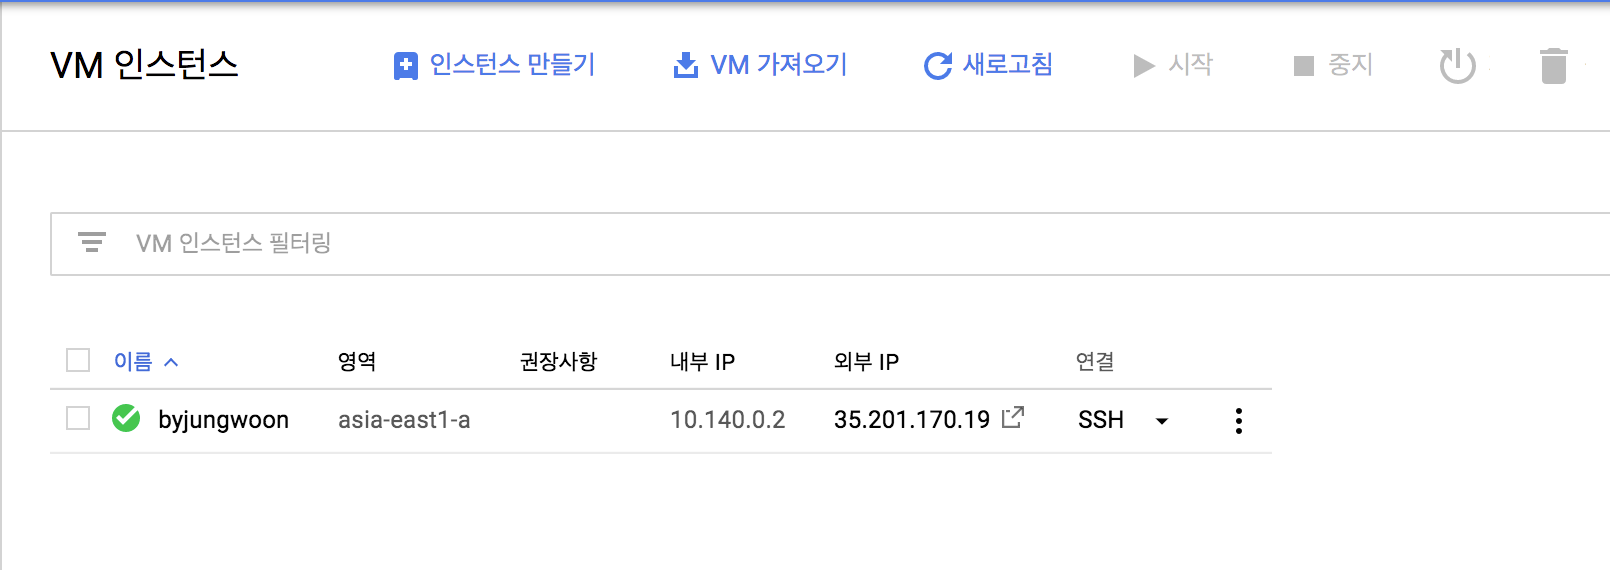
끝나면 아래와 같이 생성된 인스턴스를 확인할 수 있습니다

실습 당시 버전 정보
td-agent - 0.12.40
evnetmachine - 1.2.5
fluent-plugin-gcloud-pubsub - 0.0.5
fluent-plugin-twitter - 0.6.1
twitter - 6.2.0
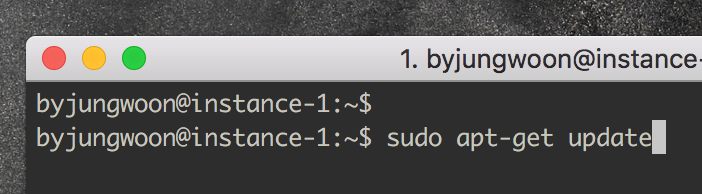
Fluentd 설치하기 (아래 설치 순서 반드시 지켜야 함)
$ sudo apt-get update
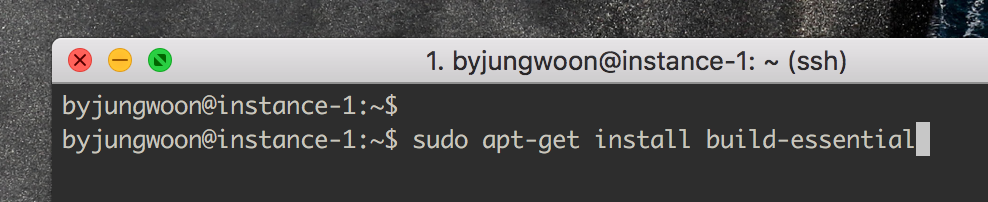
$ sudo apt-get install build-essential
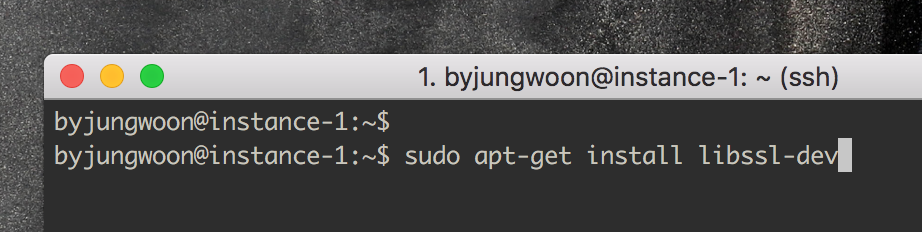
$ sudo apt-get install libssl-dev
$ curl -L https://toolbelt.treasuredata.com/sh/install-ubuntu-trusty-td-agent2.sh | sh
$ sudo td-agent-gem install eventmachine
$ sudo td-agent-gem install fluent-plugin-gcloud-pubsub
$ sudo td-agent-gem install fluent-plugin-twitter
우선 sudo apt-get update 명령어를 통해서 apt-get 명령어를 업데이트 합니다
그 다음 Fluentd 설치를 위한 필수 패키지 들을 설치하기 위해 sudo apt-get install build-essential을 누릅니다
그 다음 또 다른 필수 패키지 들을 설치하기 위해 sudo apt-get install libssl-dev을 누릅니다
이제 Fluentd 설치를 하기 위해 아래 명령어를 입력합니다
$ curl -L https://toolbelt.treasuredata.com/sh/install-ubuntu-trusty-td-agent2.sh | sh

그 다음은 플러그인 설치를 위한 패키지들을 설치 합니다 (이때 개별 플러그인들의 의존성 문제때문에 순서를 반드시 지켜야 합니다)


참고 (tdagent 관련 명령어)
$ sudo /etc/init.d/td-agent start
$ sudo /etc/init.d/td-agent stop
$ sudo /etc/init.d/td-agent restart
$ sudo /etc/init.d/td-agent status
$ sudo vi /etc/td-agent/td-agent.conf
$ tail -f /var/log/td-agent/td-agent.log
설정 파일
설정을 해 놓으면 편한 설정 및 fluentd 설정을 진행하도록 하겠습니다
~/.bashrc 설정
td-agent 명령어 자체가 매번 sudo를 입력해야하고 경로들도 길기 때문에 줄이기 위해서 아래와 같이 설정을 만들어서 ~/.bashrc에 설정을 하였습니다
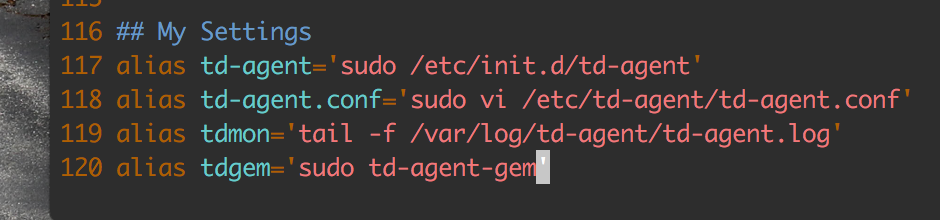
## My Settings
alias td-agent='sudo /etc/init.d/td-agent'
alias td-agent.conf='sudo vi /etc/td-agent/td-agent.conf'
alias tdmon='tail -f /var/log/td-agent/td-agent.log'
alias tdgem='sudo td-agent-gem'
이제 ~/.bashrc에 매번 입력할 명령어를 줄이기 위해 아래 세팅을 추가합니다
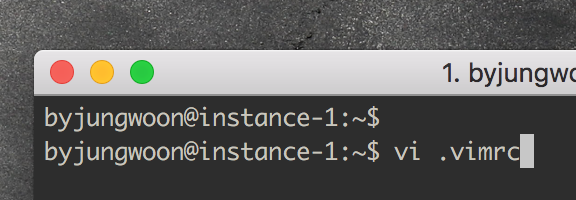
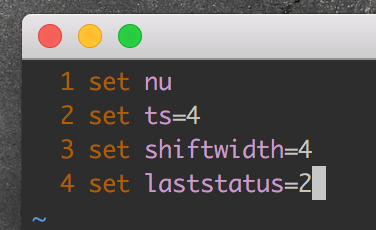
~/.vimrc 설정
여기는 vi editor를 이용할때 필요한 세팅을 하는 부분인데 굳이 안해도 상관 없습니다
set nu
set ts=4
set shiftwidth=4
set laststatus=2
이번엔 ~/.vimrc에 vim 설정을 추가합니다
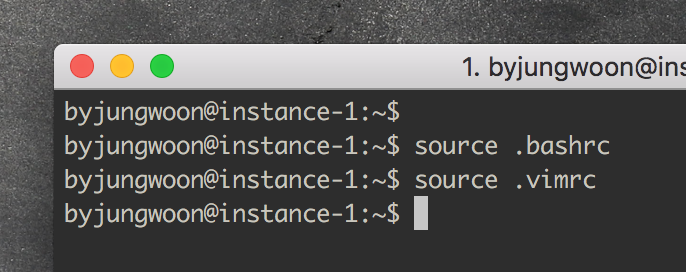
그 다음 변경된 설정 파일들을 적용하기 위해 source명령어를 통해서 변경사항을 적용합니다
아래와 같이 설정 파일 변경에 따른 적용을 바로 하기 위해서는 source 명령어를 써야 합니다
td-agent.conf에 필요한 Twitter API Key와 Token 얻기
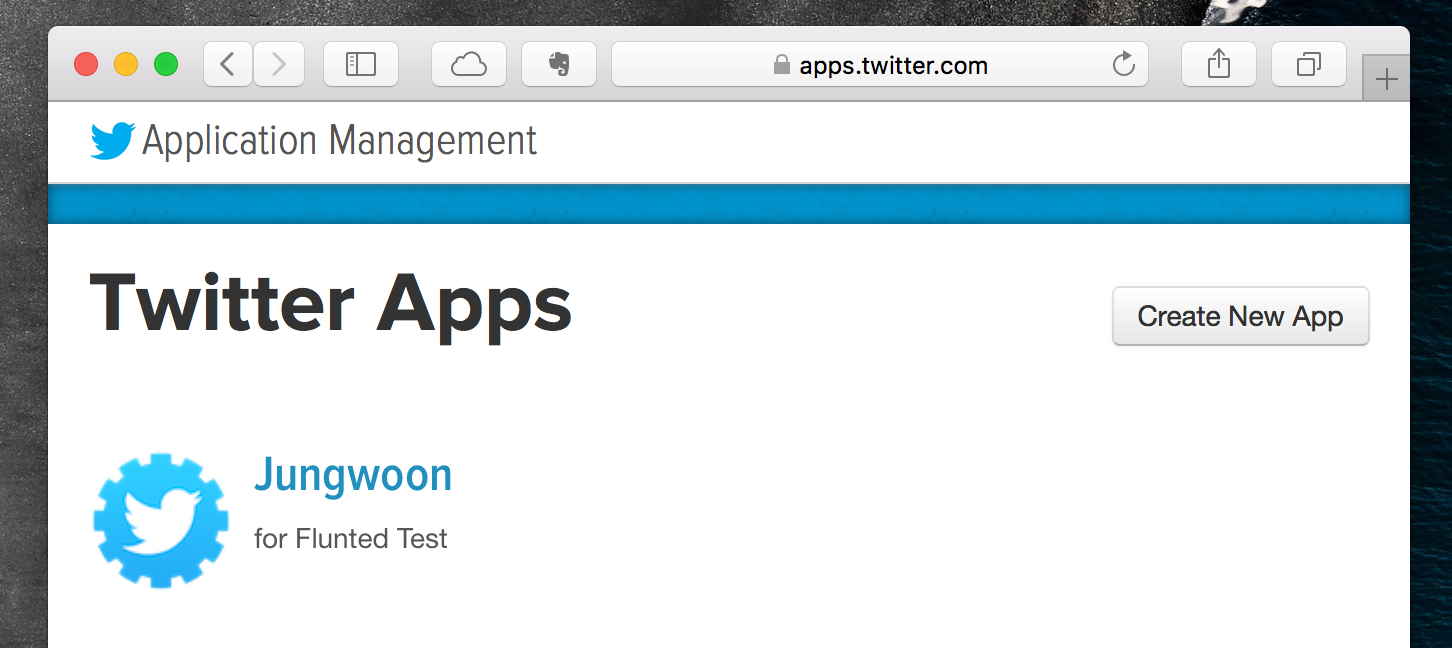
트위터에서 실시간 Feed를 받기 위해 필요한 API 키와 토큰을 얻기 위해 https://apps.twitter.com에 들어갑니다
로그인을 하면 아래와 같은 화면을 볼 수 있습니다. 여기서 우측 상단에 Create New App 버튼을 누릅니다
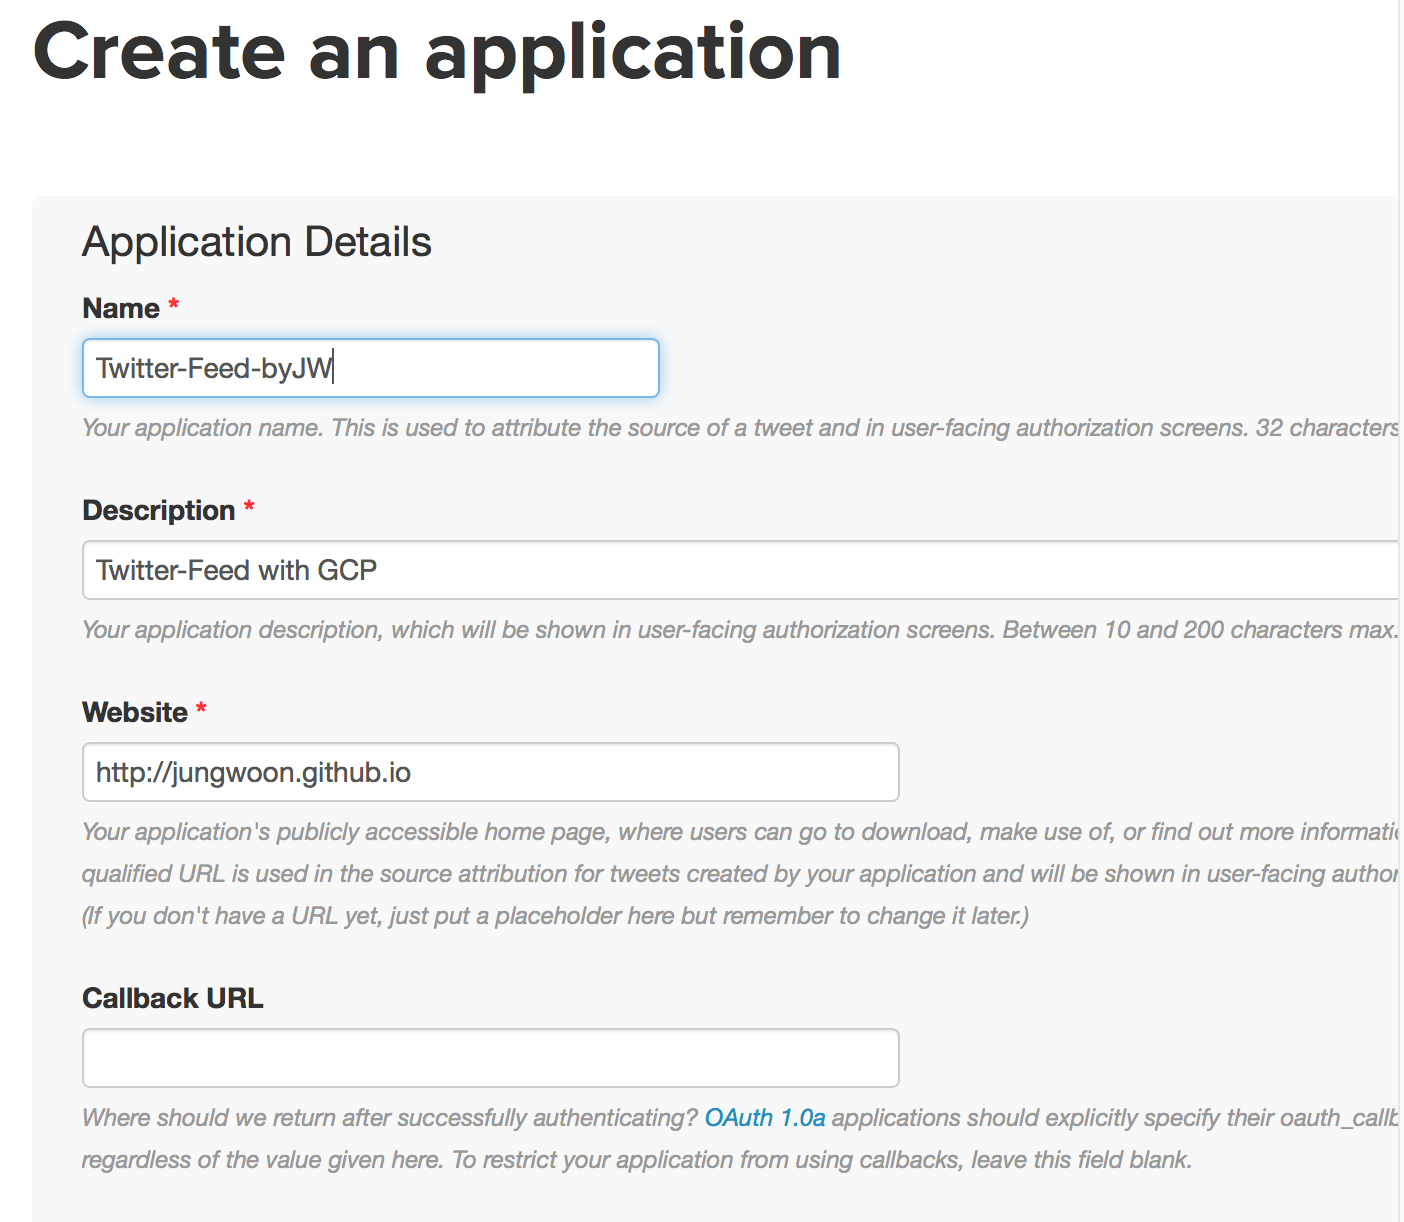
그럼 아래와 같이 입력하라고 하는 폼이 나오는데, 적당히 필요한 정보들을 넣어주고 스크롤을 내립니다
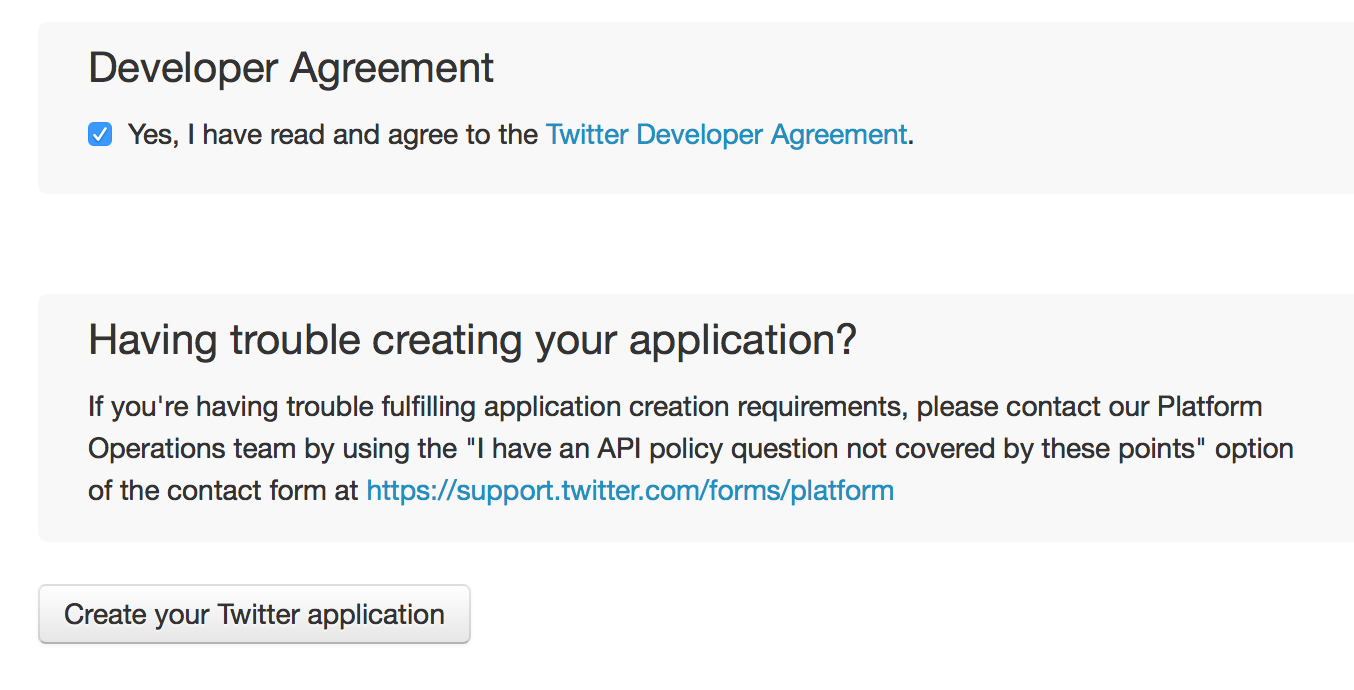
그럼 아래와 같은 화면이 나오는데 Developer Agreement에 동의를 위해 체크를 하고 Create your Twitter application을 누릅니다
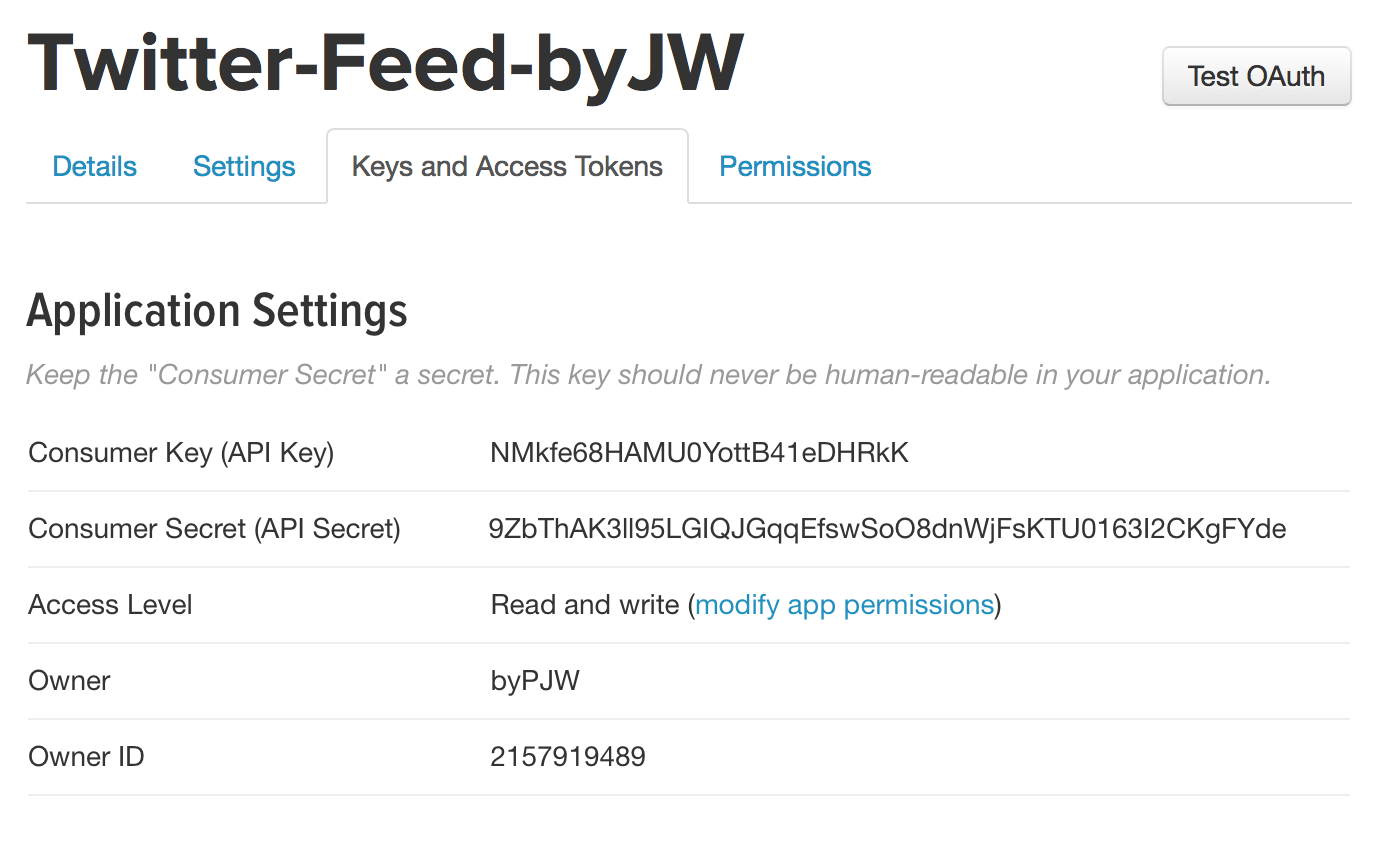
큰 문제가 없다면 다음과 같이 생성이 되고 이 중에 Keys and Access Tokens 탭을 누릅니다
그럼 Consumer Key와 Consumer Secret를 확인할 수 있습니다
하지만 아직 Token은 생성이 안되었기 때문에 스크롤을 내려서 Create my access token을 누릅니다
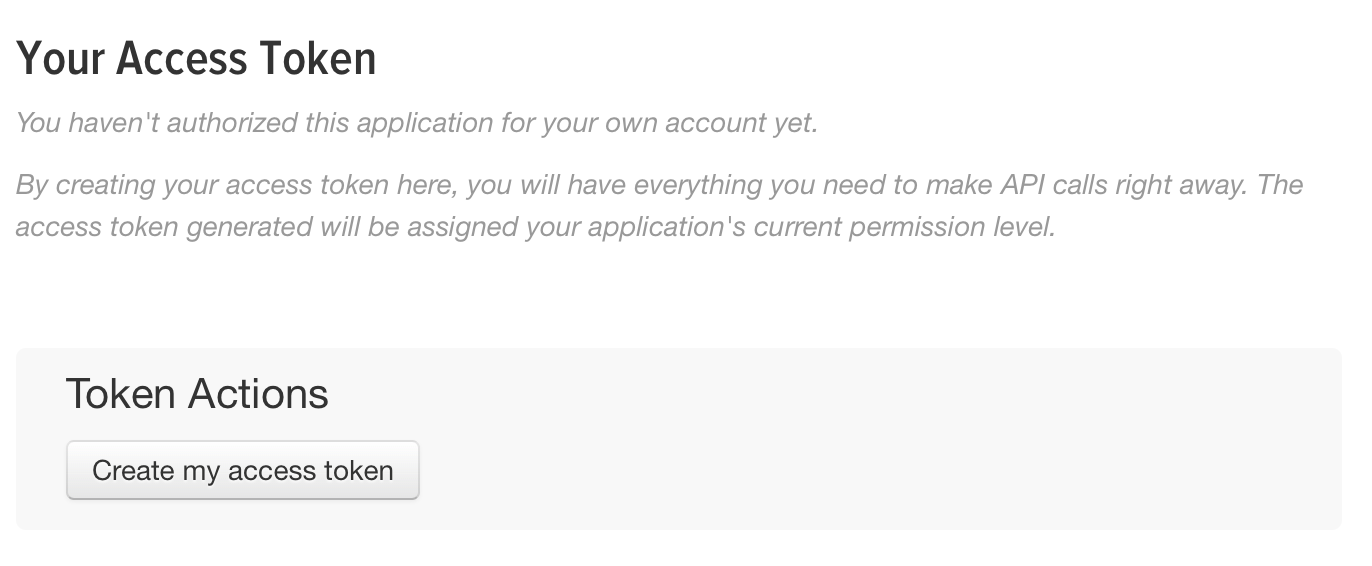
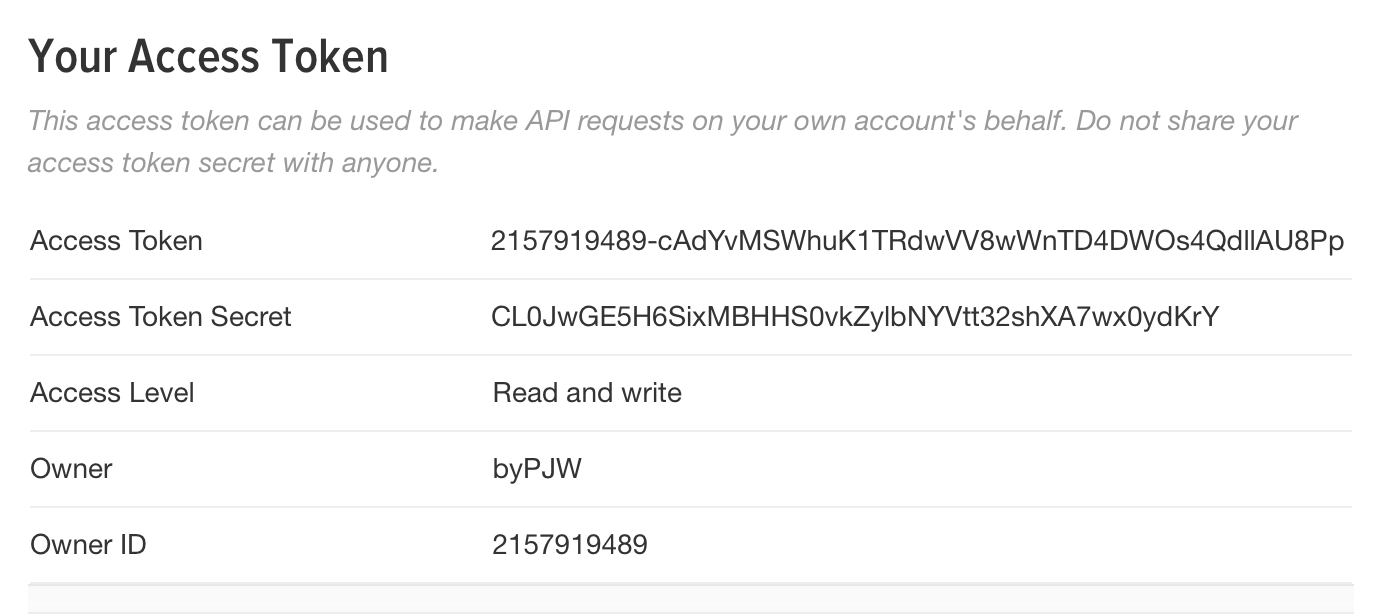
그럼 바로 아래와 같이 Access Token과 Access Token Secret 정보를 확인할 수 있게 됩니다
PubSub에서 Topic & Subscription 만들기
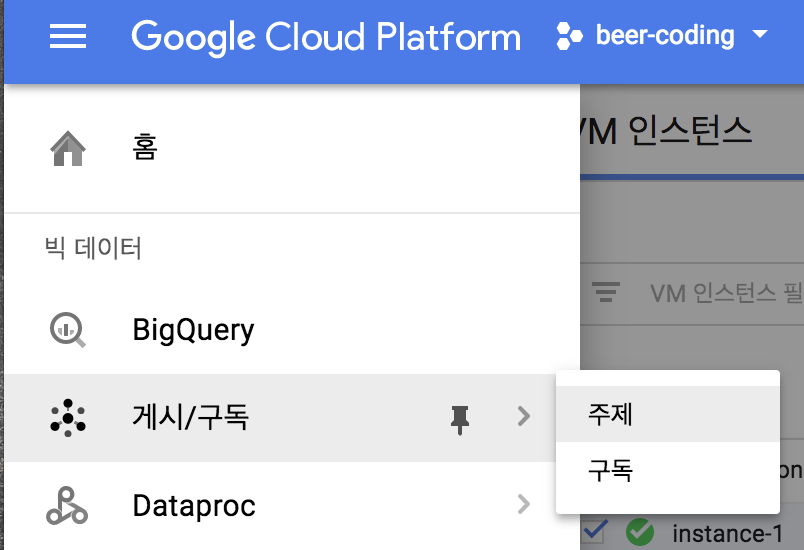
Google Cloud Console에서 메뉴 - 게시/구독을 누릅니다
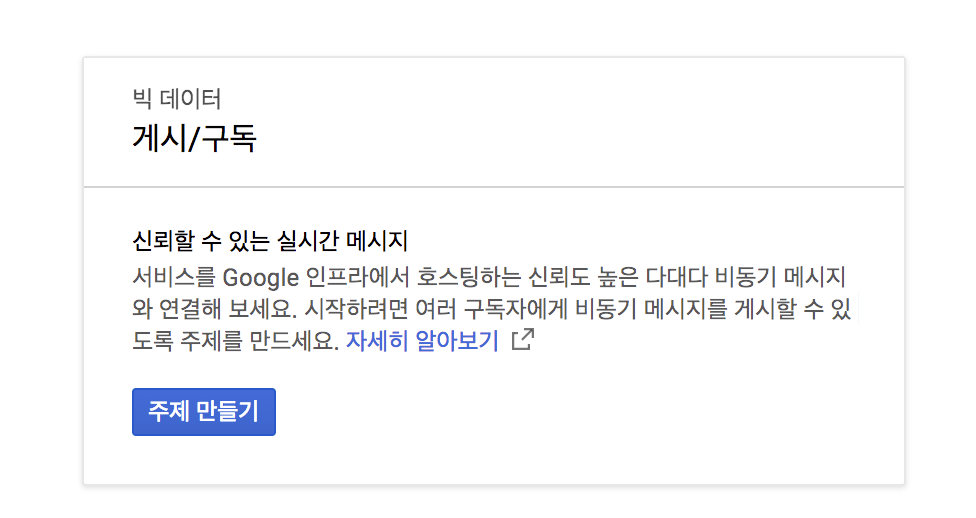
그 다음 주제 만들기 를 눌러서 Topic을 만듭니다
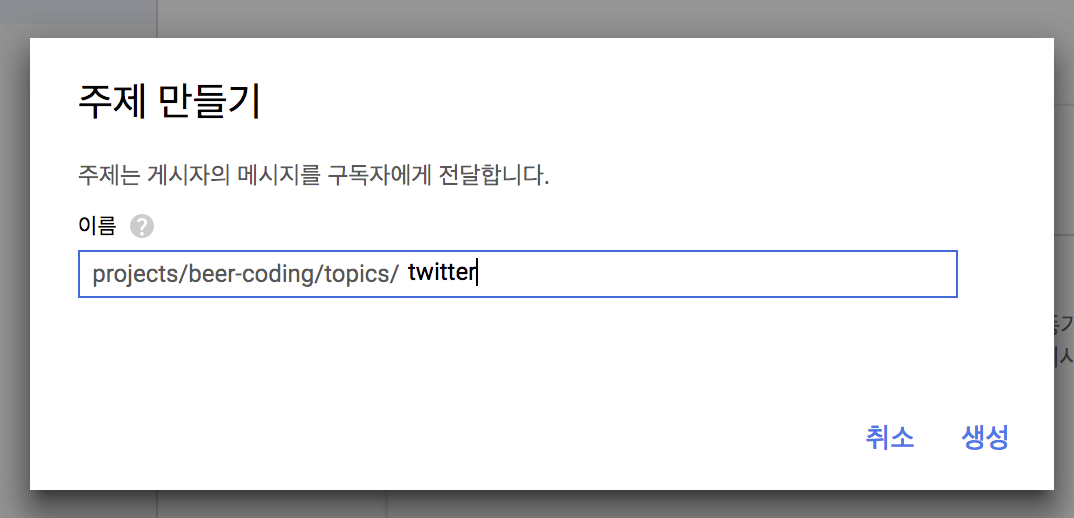
Topic의 이름을 정해야 하는데 일단 twitter로 지정하도록 하겠습니다
그 다음 생성 버튼을 누릅니다
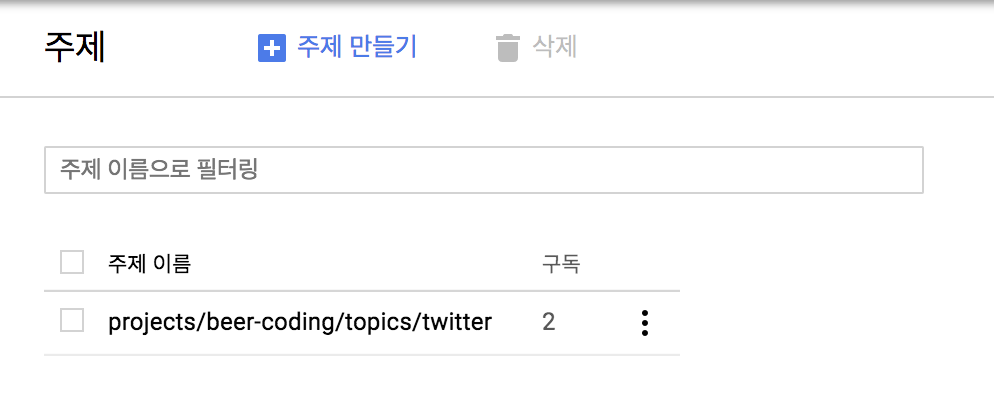
그럼 아래 토픽이 생성된것을 확인할 수 있습니다
아래의 설정에서는 이 주제 이름 (=projects/beer-coding/topics/twitter)이 필요하게 됩니다
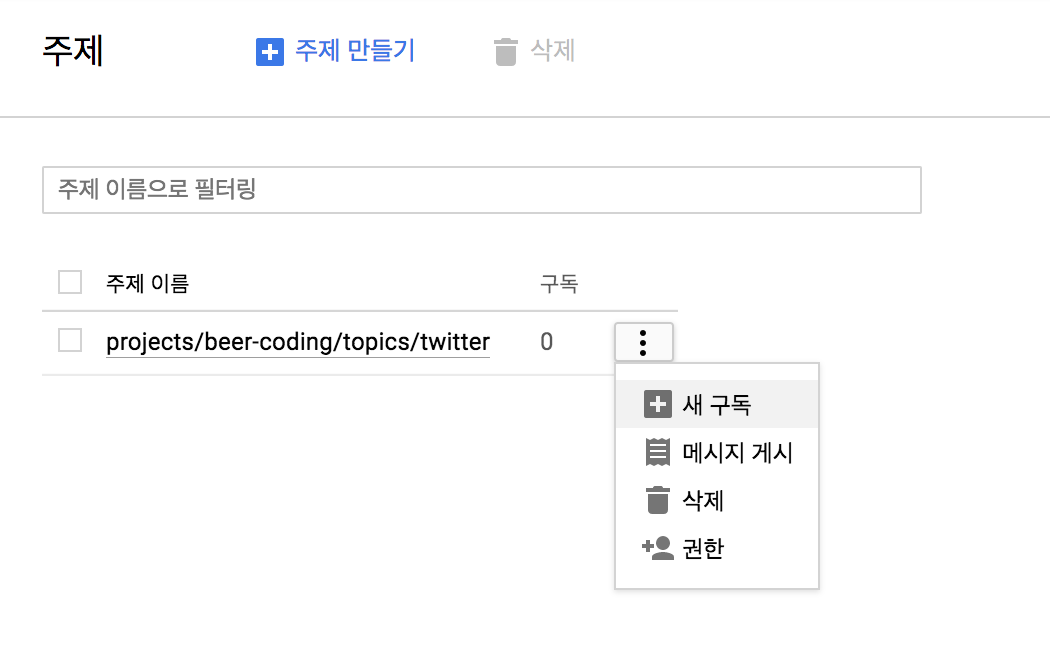
주제(=Topic)에서 메뉴 - 새 구독을 누릅니다
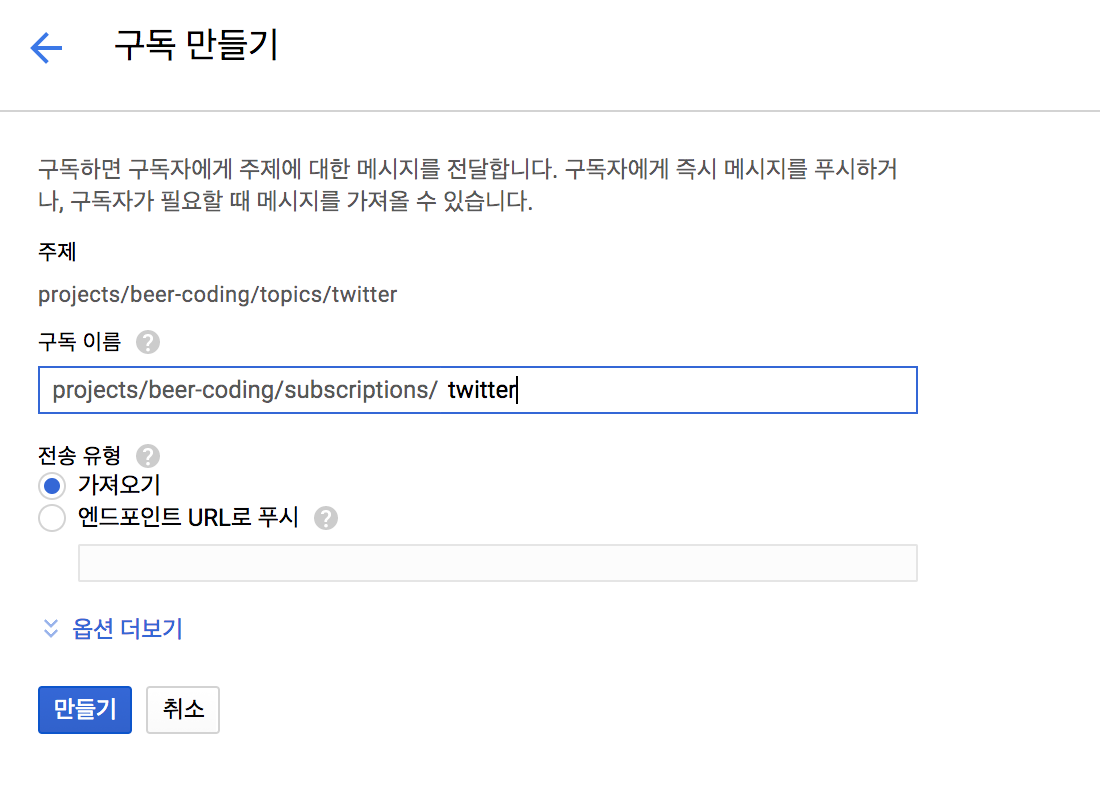
여기는 해당 토픽에 대한 구독으로 똑같이 twitter 란 이름을 주고 만들기 버튼을 누릅니다
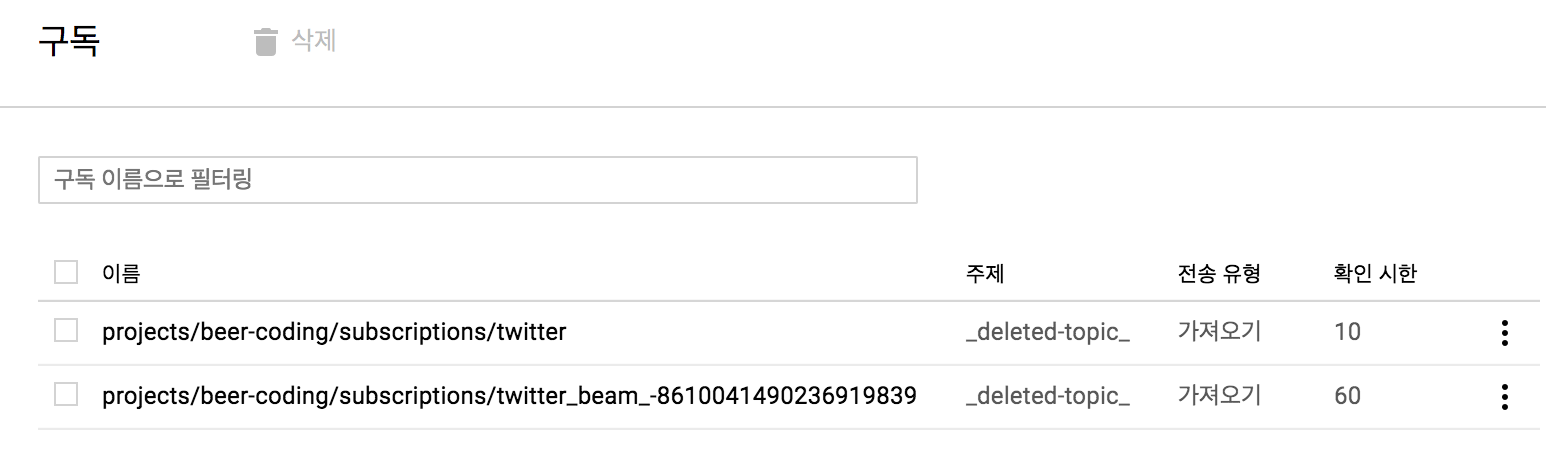
끝나면 구독란에 twitter란 이름으로 만들어진것을 확인할 수 있습니다
(이 구독은 아래 Node.js 에서 이용하게 됩니다)
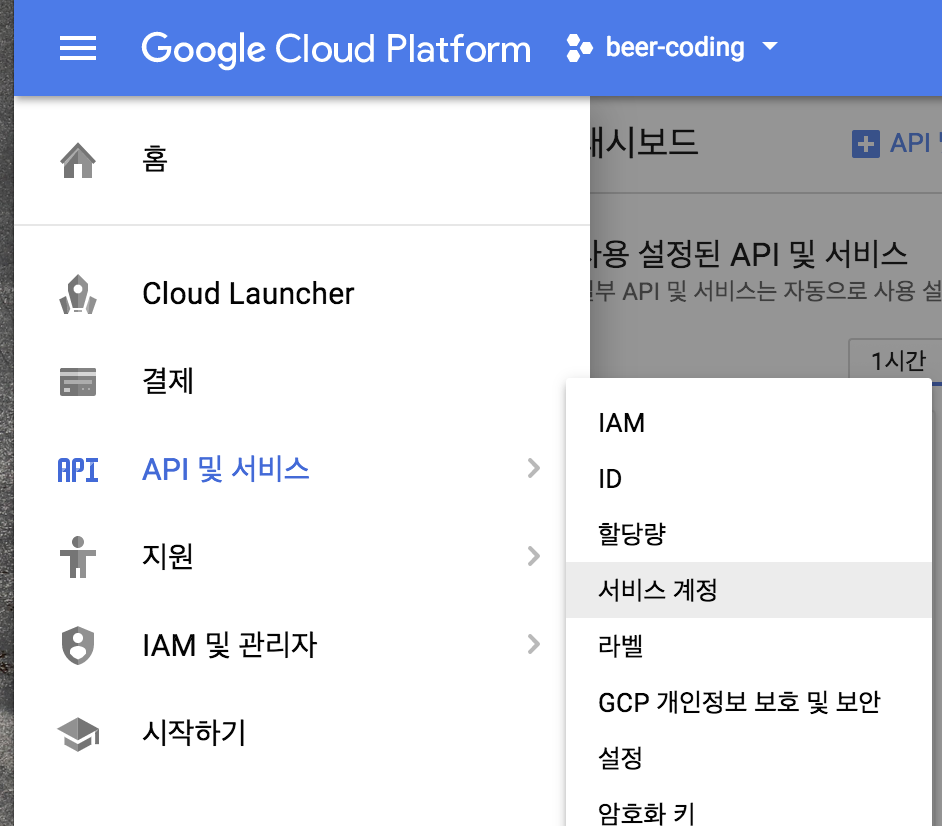
서비스 계정 키 얻기
GCP 서비스를 이용하기 위한 서비스 계정 키를 얻기 위해 Google Cloud Console에서
메뉴 - API 및 서비스 - 서비스 계정을 누릅니다
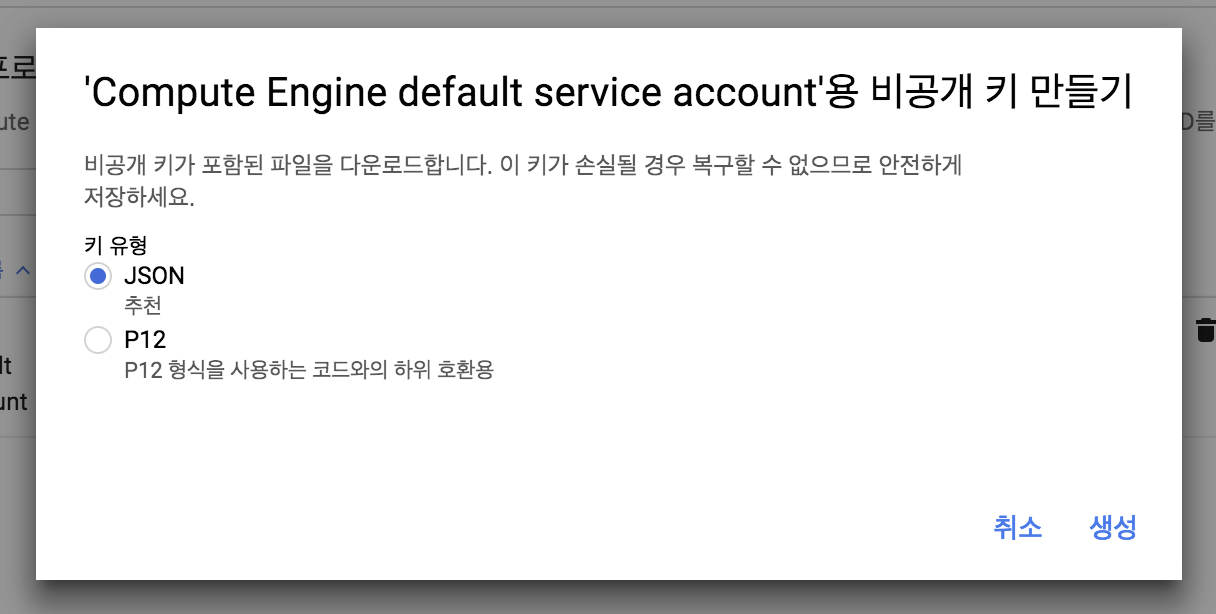
아래와 같이 나오면 우측에 메뉴를 누르고 키 만들기를 누릅니다

그럼 아래와 같이 JSON 또는 P12를 선택하라고 하는데 여기서는 JSON을 선택하고 생성 버튼을 누릅니다
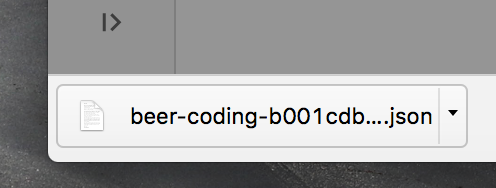
그럼 자동으로 Local로 다운로드 받아지게 됩니다
(한번밖에 다운로드 되지 않기 때문에 잘 보관해야 합니다)
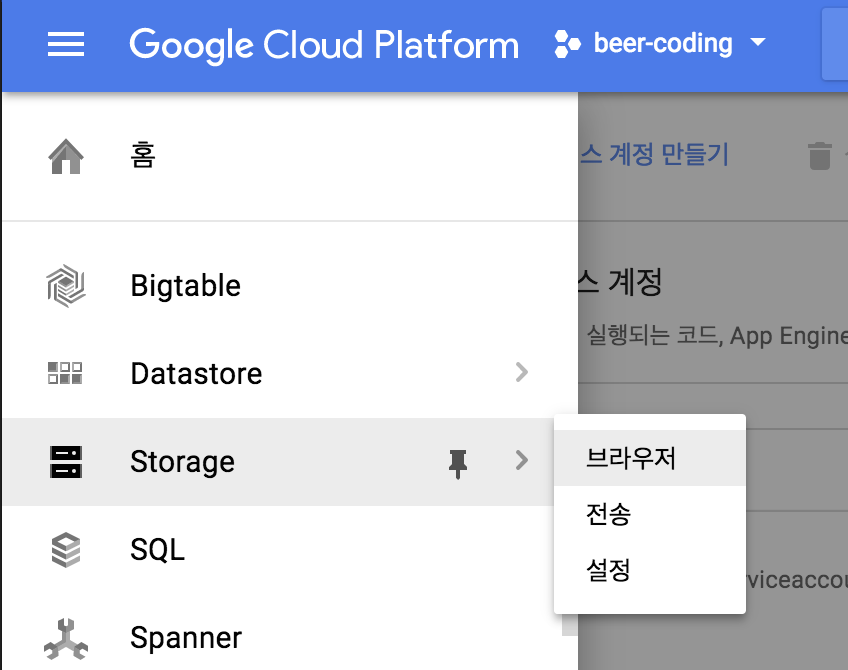
로컬로 다운받아진 서비스 계정 키 GCS를 통해서 Compute Engine에서 받기
위에서 서비스 계정키를 받으면 로컬로 다운로드가 되는데, 이를 GCS를 이용하여 처음에 만든 Compute Engine으로 넘기도록 하겠습니다
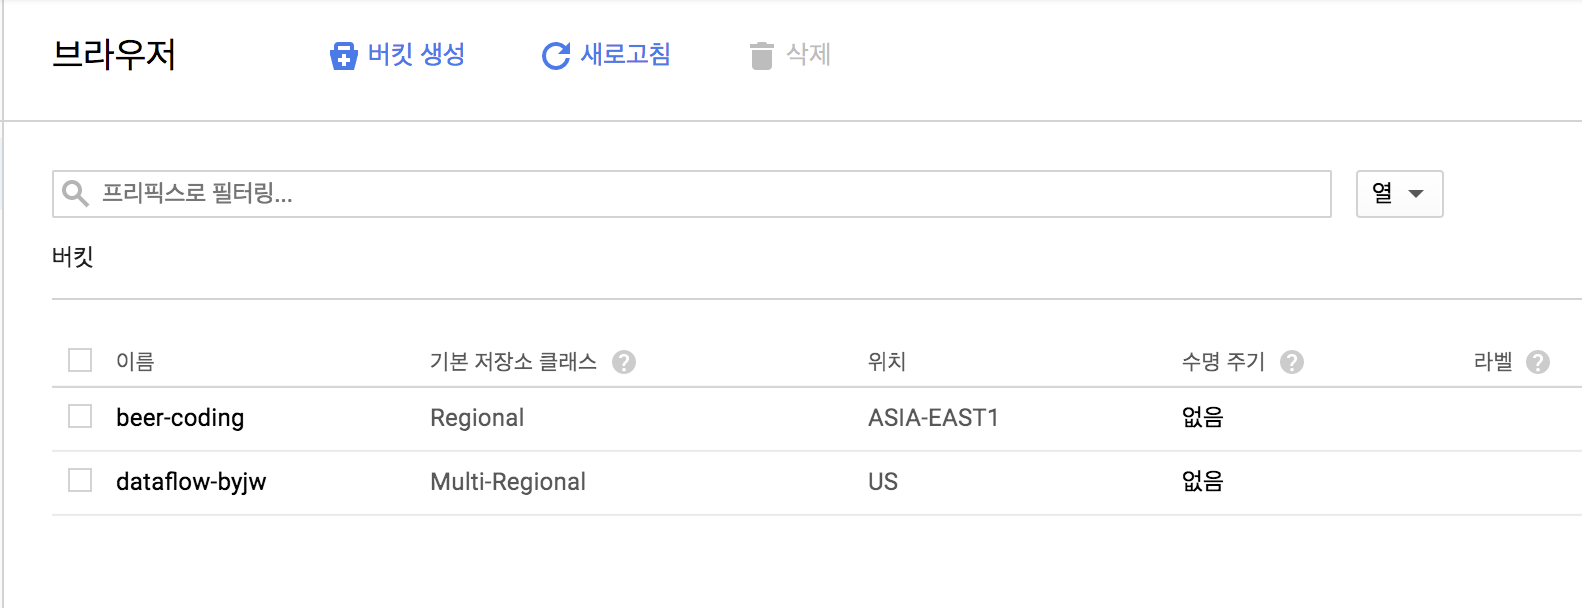
Google Cloud Console에서 메뉴 - Storage을 누릅니다
아래와 가팅 나오면 버킷 생성을 누릅니다
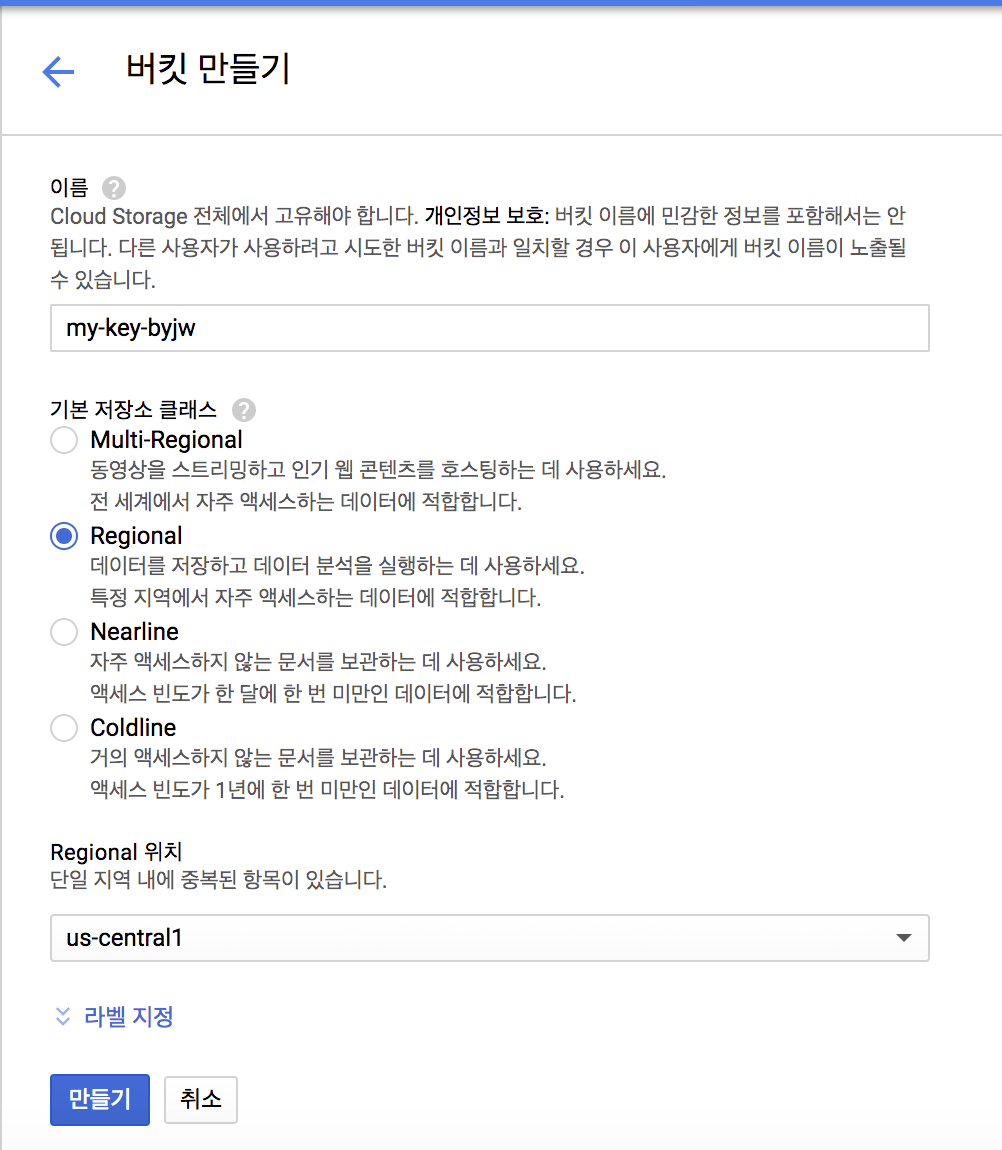
임의의 이름을 넣고 Regional을 누른뒤에 만들기 버튼을 누릅니다
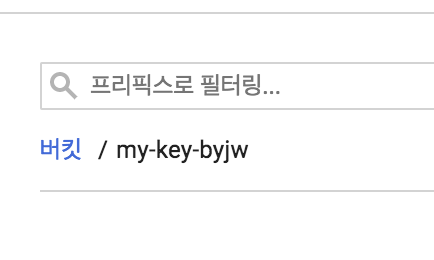
그럼 다음과 같이 버킷이 생성이 됩니다
버킷의 형태는 gs://my-key-byjw/와 같이 됩니다
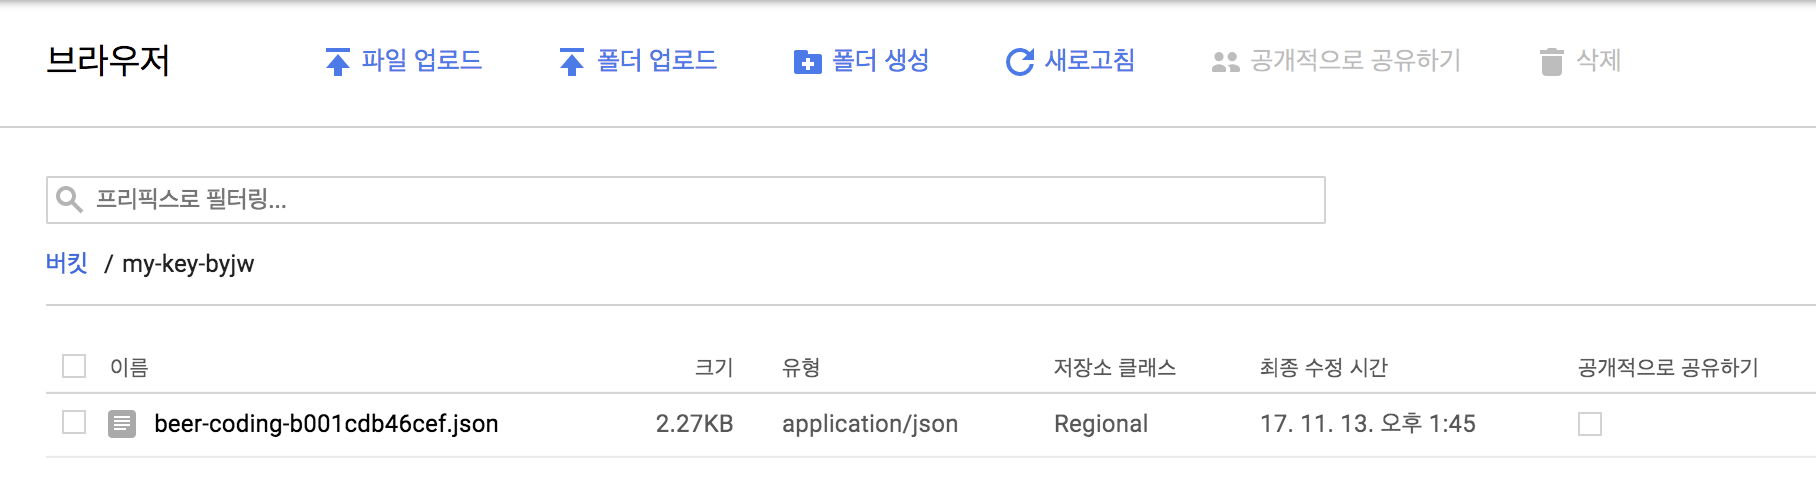
이제 아까 다운로드 받아진 디렉토리로 가서 아래 명령어를 통해 서비스 계정 키를 위의 버킷(=gs://my-key-byjw/)로 보냅니다
$ gsutil cp beer-coding-b001cdb46cef.json gs://my-key-byjw/
(gsutil에 대한 자세한 내용을 알고 싶으면 Google Cloud Storage의 gsutil 명령어 살펴보기를 참고하세요)

위의 명령어가 완료가 되면 좀전에 만들어진 버킷에 키가 복사가 된것을 확인할 수 있습니다
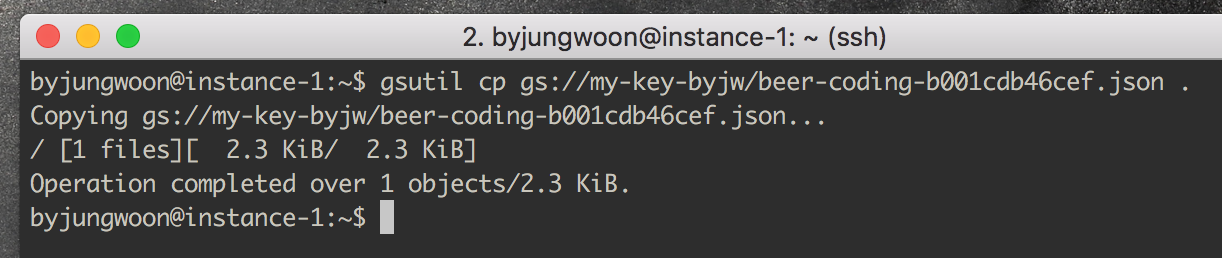
이번에는 Compute Engine의 인스턴스의 홈 디렉토리에서 아래 명령어를 입력하여 버킷에 있는 키를 받습니다
$ gsutil cp gs://my-key-byjw/beer-coding-b001cdb46cef.json .
그 다음 해당 키의 경로를 확인해뒀다가 아래 td-agent.conf 파일에 입력하도록 합니다

/etc/td-agent/td-agent.conf 설정 (Fluentd 설정 파일)
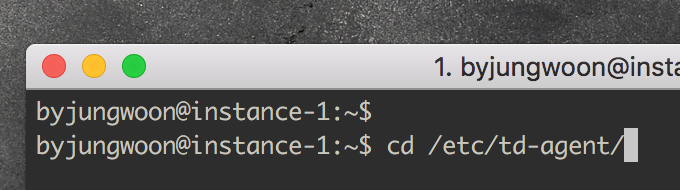
이번엔 fluentd 설정 파일을 수정하기 위해 아래 명령어로 해당 경로로 들어갑니다
$ cd /etc/td-agent/
기존의 있던 td-agent.conf파일을 td-agent.conf.bak으로 이름을 바꿔서 백업을 해줍니다
(이유는 기존의 Sample로 설정되어있는 내용들이 많은데 굳이 필요가 없어서, 백업을 해놓고 실제 필요한 설정만 하여 설정 파일을 만들기 위해서 입니다)
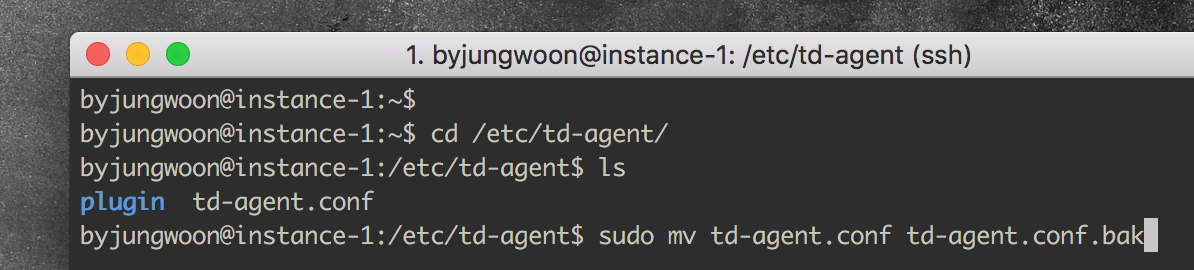
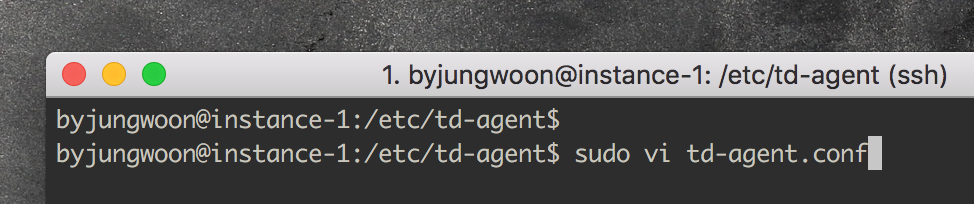
기존의 있떤 td-agent.conf 파일의 이름을 바꿔서 없어졌기 때문에 vi를 통해서 td-agent.conf 파일을 만들어 줍니다
/etc/td-agent/td-agent.conf (템플릿)
<source>
    @type twitter
    consumer_key    [my-consumer_key] # 위에서 얻은 트위터 consumer_key
    consumer_secret         [my consumer_secret] # 위에서 얻은 트위터 consumer_secret
    access_token     [my-access_token] # 위에서 얻은 트위터 access_token
    access_token_secret      [my-access_token_secret] # 위에서 얻은 트위터 access_token_secret
    tag     input.twitter
    timeline        sampling
    keyword         [Search Keyword] # 피드를 보고 싶은 키워드로 ','로 여러개도 가능
    output_format   nest
</source>

### for Standout

<match input.twitter>
    @type stdout
</match>

### for Cloud Pub/Sub

#<match input.twitter>
#   @type gcloud_pubsub
#   project [my project name] # 본인의 구글 클라우드 프로젝트 명
#   topic [my topic path] # 본인의 토픽 명
#   key [my account key] # 본인의 서비스 계정 키 경로 (절대경로)
#   flush_interval 10
#   autocreate_topic false
#</match>
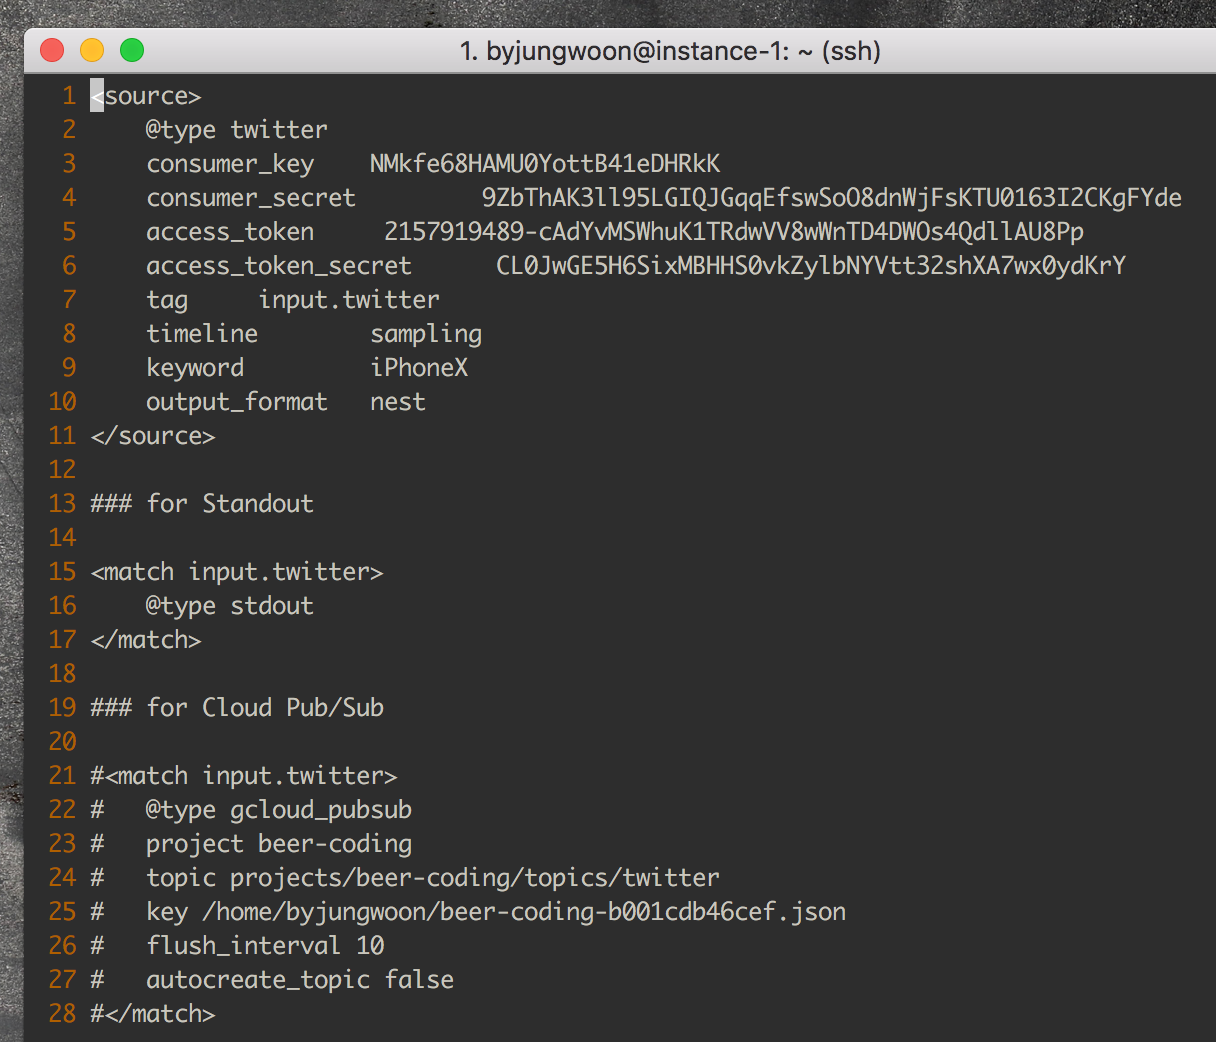
/etc/td-agent/td-agent.conf (내 설정)
<source>
    @type twitter
    consumer_key    lvN5uFPnxBKImldP3rrmHq2vh
    consumer_secret         kY0SAww8kRQhTA6Pp044JzCIMwSXdLyF2RKu71eam54iGtwvDj
    access_token     2157919489-duFYYM21tjMWmMLxz1QA29U2L8mzmVZ9UkfZlsP
    access_token_secret      ovRtUMrfjOB9dV7CYnzZy8IUI2DhOWtP0zJtokTrmgYxz
    tag     input.twitter
    timeline        sampling
    keyword         iPhoneX
    output_format   nest
</source>

### for Standout

<match input.twitter>
    @type stdout
</match>

### for Cloud Pub/Sub

#<match input.twitter>
#   @type gcloud_pubsub
#   project beer-coding
#   topic projects/beer-coding/topics/twitter
#   key /home/byjungwoon/key.json
#   flush_interval 10
#   autocreate_topic false
#</match>
그리고 위에 내용을 복사해서 붙여 넣기 하고 위에서 생성한 자신의 트위터 Key와 Token 그리고 자신의 시스템 설정에 맞도록 변경을 합니다
(위에 설정은 바로 PubSub이 아닌 로그가 찍히는지 확인하는 설정 입니다)
실행이 되는지 확인 해보기
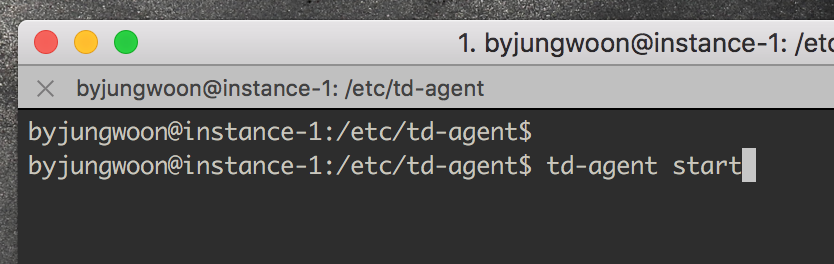
그 다음 td-agent start를 누르면 시작이 됩니다
(만약 위의 명령어를 입력했을때 동작하지 않으면 td-agent restart를 입력합니다)
그 다음 tdmon 명령어를 누릅니다
(해당 명령어는 모니터링을 위한 명령어로 tail -f /var/log/td-agent/td-agent.log를 매번 치기 귀찮아서 줄인 명령어입니다)
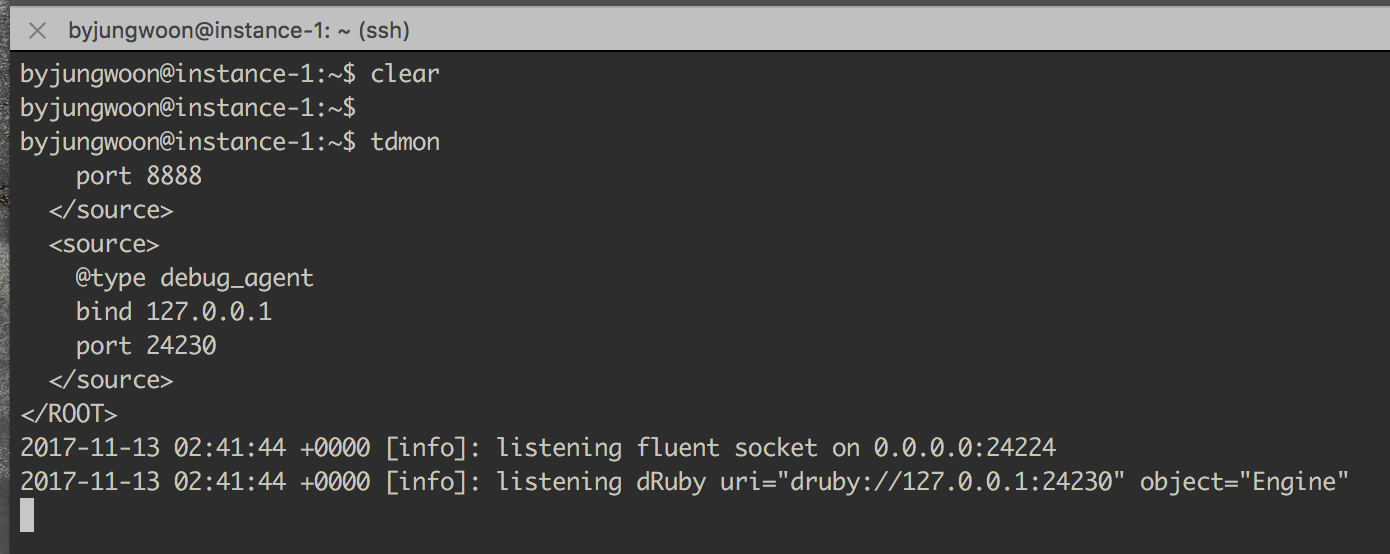
여기까지 정상적으로 되었다면 아래와 같이 설정 파일에 지정한 Keyword가 언급된 피드들이 실시간으로 올라가는게 확인될 것입니다
PubSub에 트위터 피드 전달 하기
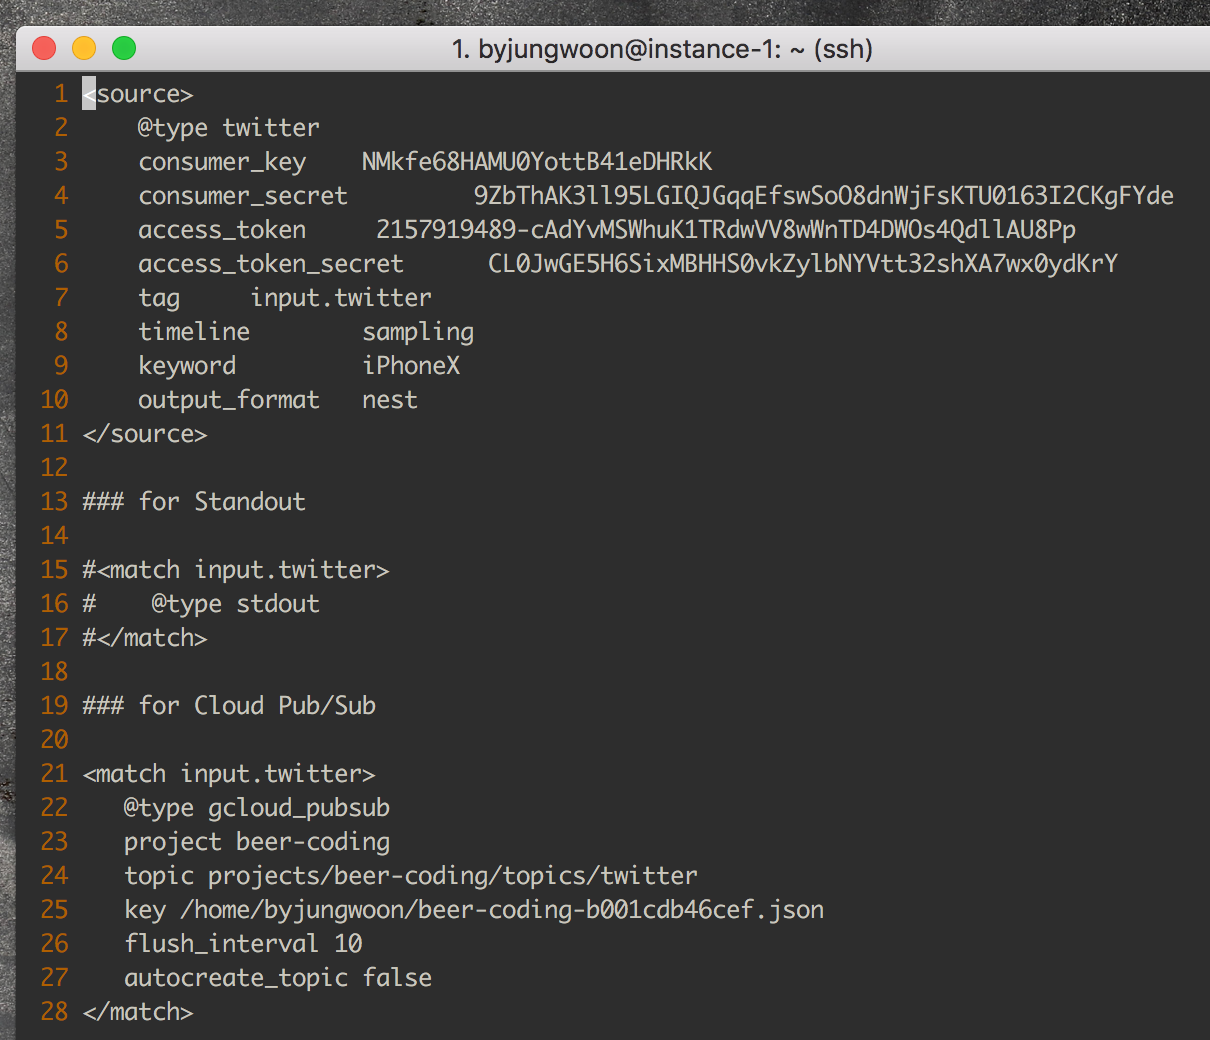
$ td-agent.conf 명령어를 눌러서 아래 스크린샷과 같이 설정을 합니다
(바뀐 부분은 15~17 라인이 주석이 되었고, 주석이 되어 있던 21~28 라인이 주석이 해제 되었습니다)
/etc/td-agent/td-agent.conf (템플릿)
<source>
    @type twitter
    consumer_key    [my-consumer_key] # 위에서 얻은 트위터 consumer_key
    consumer_secret         [my consumer_secret] # 위에서 얻은 트위터 consumer_secret
    access_token     [my-access_token] # 위에서 얻은 트위터 access_token
    access_token_secret      [my-access_token_secret] # 위에서 얻은 트위터 access_token_secret
    tag     input.twitter
    timeline        sampling
    keyword         [Search Keyword] # 피드를 보고 싶은 키워드로 ','로 여러개도 가능
    output_format   nest
</source>

### for Standout

#<match input.twitter>
#    @type stdout
#</match>

### for Cloud Pub/Sub

<match input.twitter>
   @type gcloud_pubsub
   project [my project name] # 본인의 구글 클라우드 프로젝트 명
   topic [my topic path] # 본인의 토픽 명
   key [my account key] # 본인의 서비스 계정 키 경로 (절대경로)
   flush_interval 10
   autocreate_topic false
</match>
/etc/td-agent/td-agent.conf (내 설정)
<source>
    @type twitter
    consumer_key    lvN5uFPnxBKImldP3rrmHq2vh
    consumer_secret         kY0SAww8kRQhTA6Pp044JzCIMwSXdLyF2RKu71eam54iGtwvDj
    access_token     2157919489-duFYYM21tjMWmMLxz1QA29U2L8mzmVZ9UkfZlsP
    access_token_secret      ovRtUMrfjOB9dV7CYnzZy8IUI2DhOWtP0zJtokTrmgYxz
    tag     input.twitter
    timeline        sampling
    keyword         iPhoneX
    output_format   nest
</source>

### for Standout

#<match input.twitter>
#    @type stdout
#</match>

### for Cloud Pub/Sub

<match input.twitter>
   @type gcloud_pubsub
   project beer-coding
   topic projects/beer-coding/topics/twitter
   key /home/byjungwoon/key.json
   flush_interval 10
   autocreate_topic false
</match>
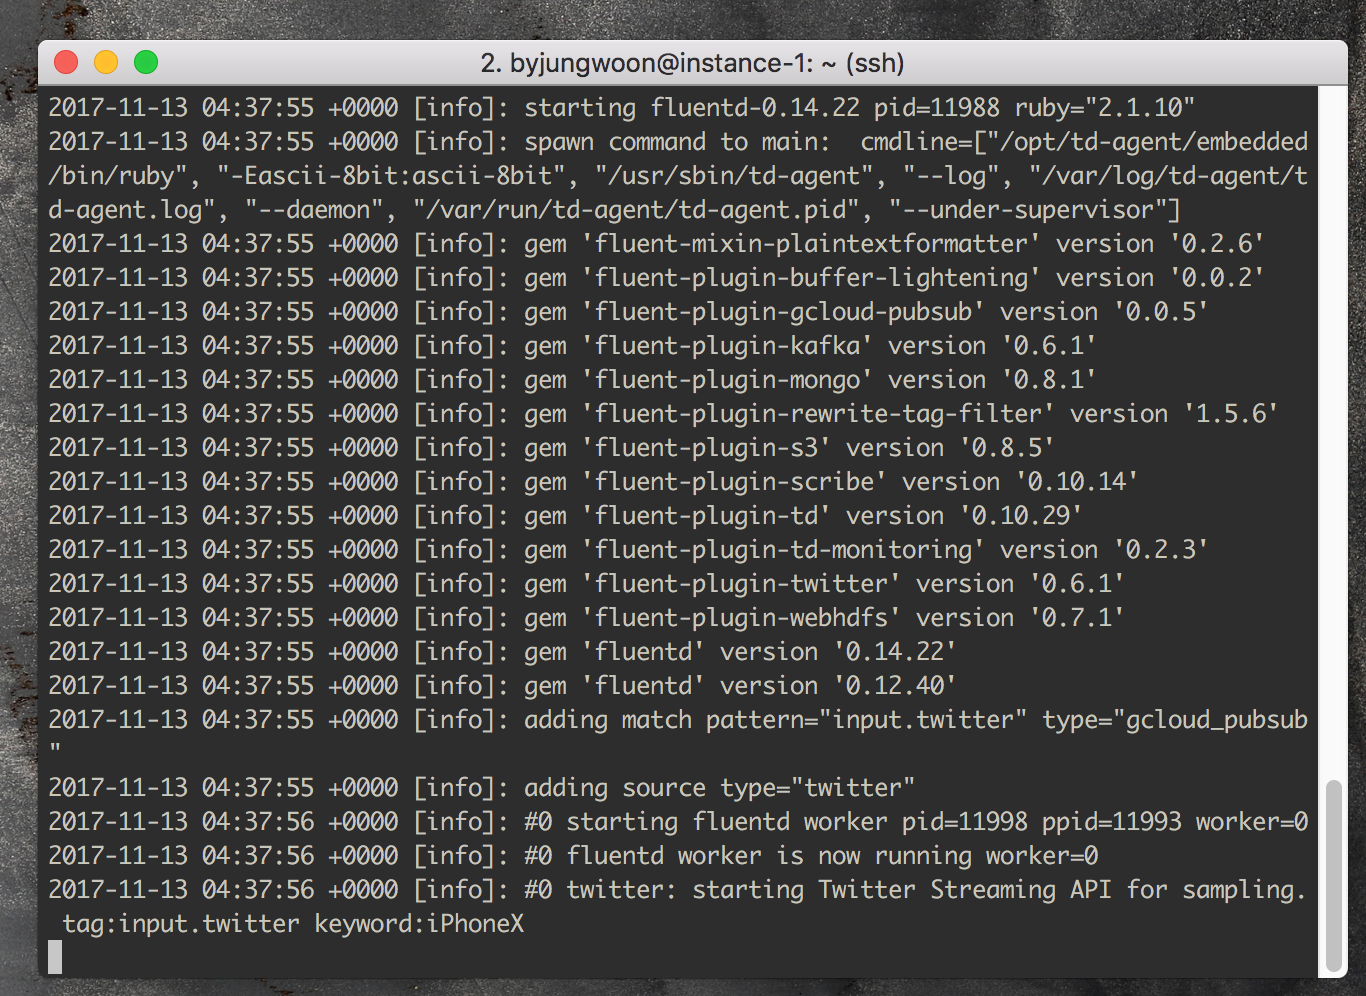
그 다음 td-agent restart를 눌러서 서비스를 재시작을 합니다
그 다음 tdmon을 눌러서 로그를 확인할때 에러 없이 아래와 같이 나오면 PubSub으로 피드들이 전달 되게 됩니다
PubSub 데이터가 들어오는지 확인하기 위한 소스 (Node.js)
실제 PubSub으로 피드가 잘 전달 되는지 확인하기 위해선 아래와 같이 client API를 이용하여야 합니다
Node 프로젝트를 만들고 아래 패키지를 설치합니다
$ npm install google-cloud --save # 설치해야할 부분
(여기서는 Node.js에 대한 설명은 넘어가도록 하겠습니다, Node.js에 대해 자세히 알고 싶으시면 Node.js 정리를 참고하세요)
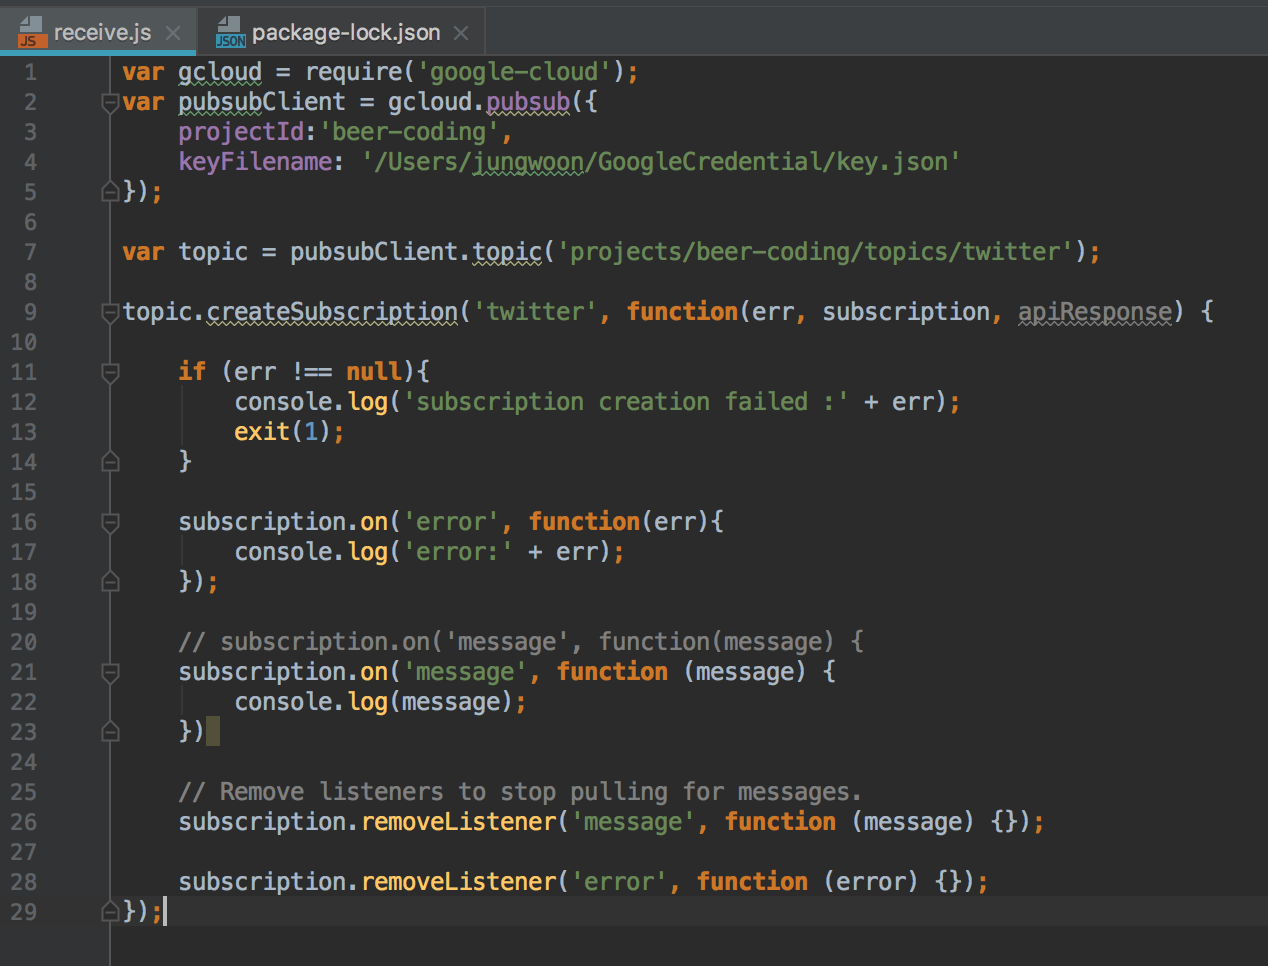
receive.js
// gcloud -> google-cloud로 대체
var gcloud = require('google-cloud');
var pubsubClient = gcloud.pubsub({
    projectId:'자신의 GCP 프로젝트 명',
    keyFilename: '자신의 서비스 계정 키 절대 경로'
});

var topic = pubsubClient.topic('자신의 PubSub 토픽'); //

topic.createSubscription('자신의 PubSub Subscription', function(err, subscription, apiResponse) {

    if (err !== null){
        console.log('subscription creation failed :' + err);
        exit(1);
    }

    subscription.on('error', function(err){
        console.log('error:' + err);
    });

    // subscription.on('message', function(message) {
    subscription.on('message', function (message) {
        console.log(message);
    })

    // Remove listeners to stop pulling for messages.
    subscription.removeListener('message', function (message) {});

    subscription.removeListener('error', function (error) {});
});
그 다음 아래 명령어를 통해서 실행합니다
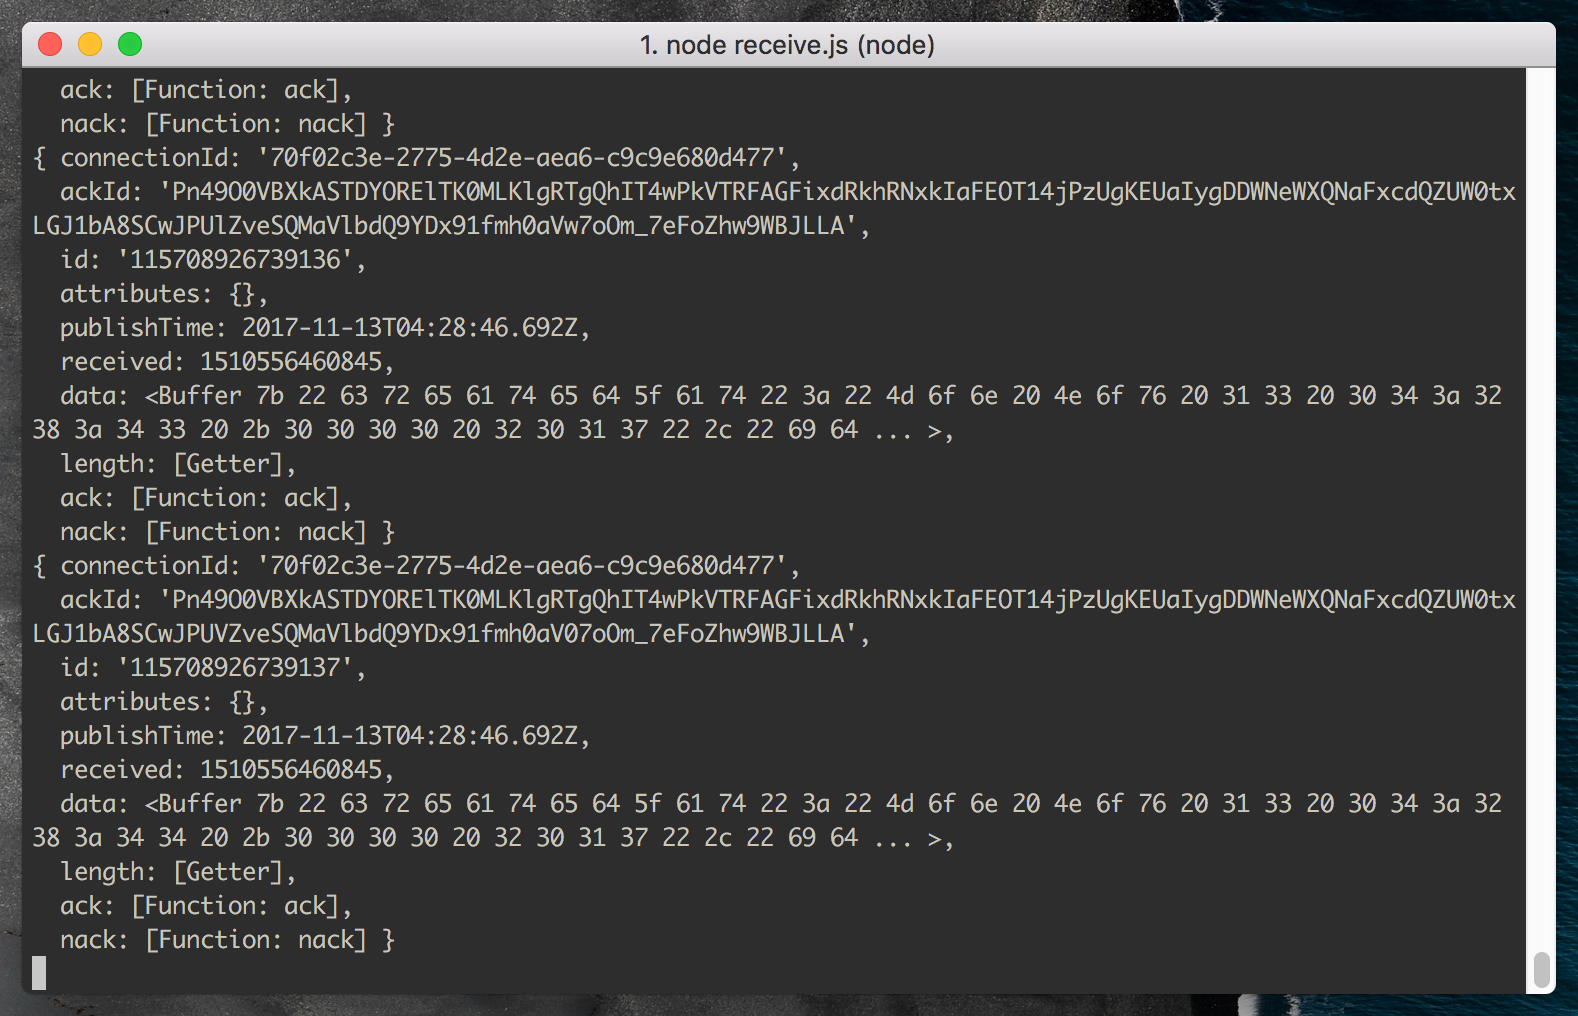
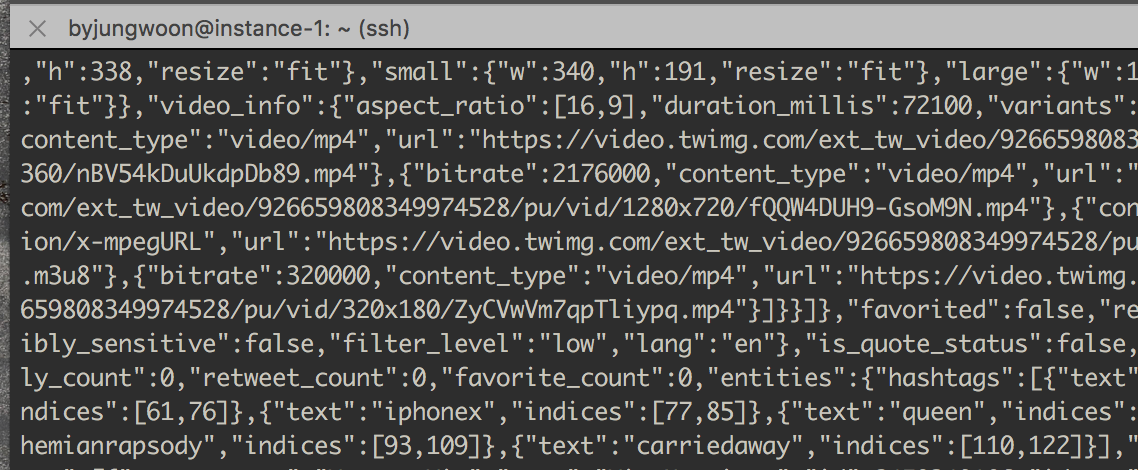
$ node receive.js

그럼 아래와 같이 실시간으로 Feed 정보가 JSON 형태로 들어오는 것을 확인할 수 있습니다