이번에는 Angular2의 컴포넌트 이용방법에 대해 알아보도록 하겠습니다.
Angular2 Component
: HTML과 CSS, Javascript를 하나의 단위로 묶어주는 기술로 최근에 나온 기술이기 때문에, 웹 컴포넌트를 이용하기 위해서는 webcomponent.js, Polymer 같은 라이브러리를 이용하여야 합니다.
웹 컴포넌트의 기술 요소
- HTML 템플릿
- 템플릿 호출
- 쉐도우 DOM
- 커스텀 엘리먼트
컴포넌트 구조
- import 영역
- @Component 장식자
- 컴포넌트 클래스 영역
컴포넌트 샘플 소스
import { Component } from '@angular/core';

@Component({
	selector: 'intro -component',
	template: `<div> App Hello </div>`,
	style: [`div { background: blue; }`]
})

export class AppHello { }
import 영역
Angular 라이브러리 모듈은 @를 붙이는데, 이는 다른 모듈과 구분하기위해서입니다. 만약 여러분이 모듈을 정의했다면 상대 경로를 통해 호출합니다.
import { Component } from '@angular/core';
@Component 장식자
컴포넌트 장식자에는 컴포넌트와 관련된 설정 정보를 입력할 수 있습니다.
- selector : 컴포넌트 이름을 정의합니다, 이 속성은 실제 html에서 사용하게 되는 커스텀 엘리먼트의 이름이 됩니다.
- template : UI를 표현하기 위한 HTML이 들어오게 됩니다.
- styles : CSS가 들어오게 됩니다.
@Component({
	selector: 'intro -component',
	template: `<div> App Hello </div>`,
	style: [`div { background: blue; }`]
})
컴포넌트 클래스 영역
처리해야할 로직이 들어오게 됩니다.
export class AppHello { }
컴포넌트 기초 실습
- 컴포넌트 추가
- 컴포넌트 모듈에 등록
실습
컴포넌트 파일의 이름은 다음과 같은 형태로 만듭니다.
[형식] : 이름.component.ts
[예] : hello.component.ts
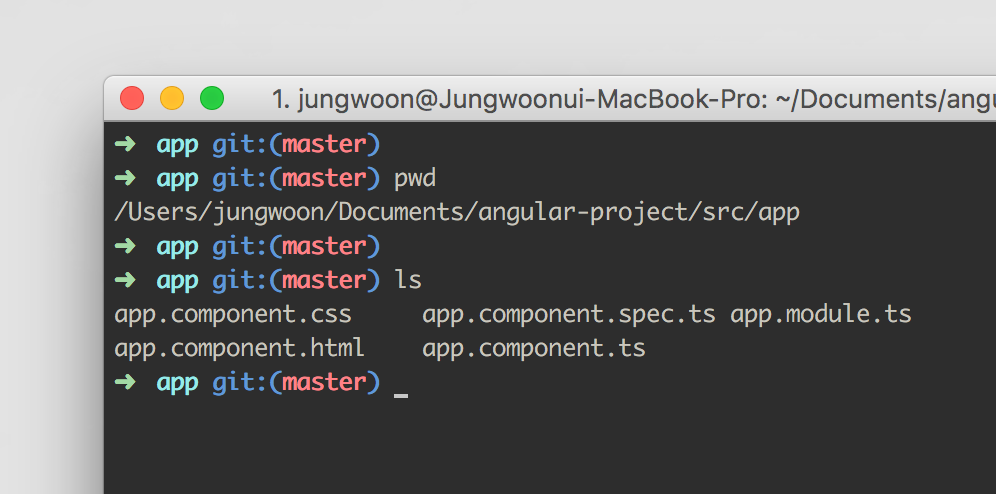
컴포넌트 생성 위치
프로젝트를 생성하면 안쪽에 프로젝트명/src/app/이 자동생성되는데, app안에 넣어줍니다.
여기서는 구분을 해주기 위해서, hello라는 디렉토리를 만들어주고 그 안에 hello.component.ts라는 파일을 만듭니다.
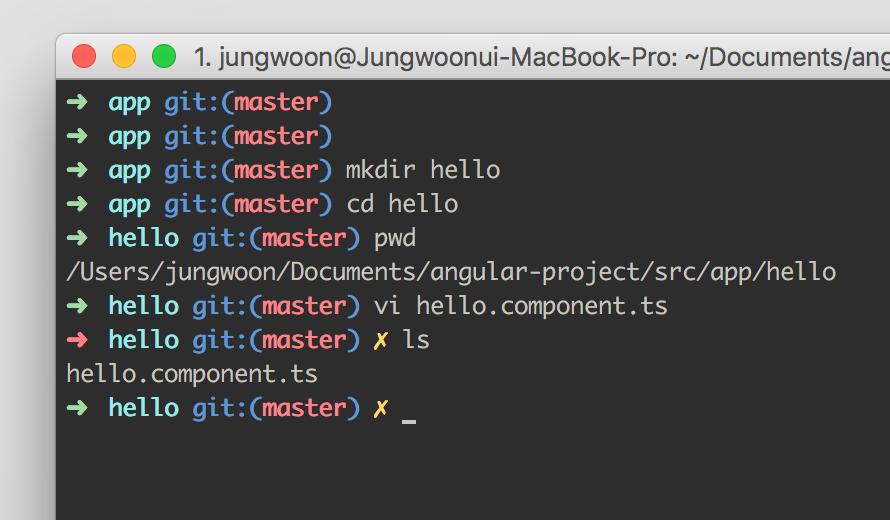
그리고 아래 소스를 입력해줍니다.
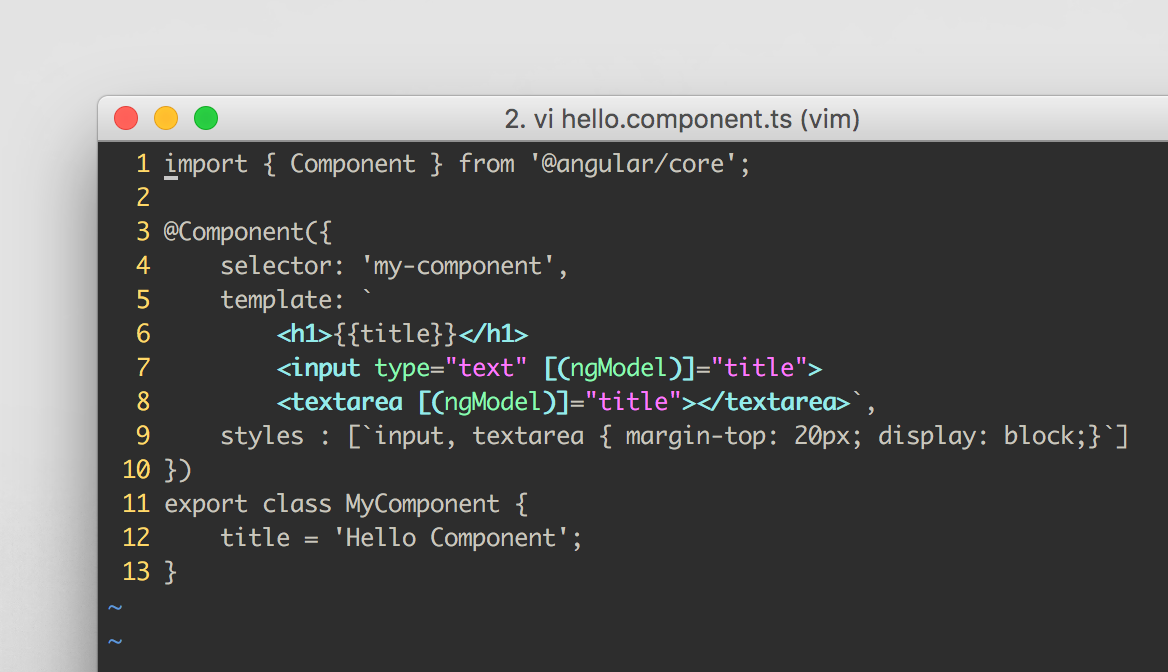
import { Component } from '@angular/core';

@Component({
	selector: 'my-component',
	template: `
		<h1></h1>
		<input type="text" [(ngModel)]="title">
		<textarea [(ngModel)]="title"></textarea>
	styles : [`input, textarea { margin-top:20px; display: block; } `]
})

export class MyComponent {
	title = 'Hello Component';
}
[Screenshot]
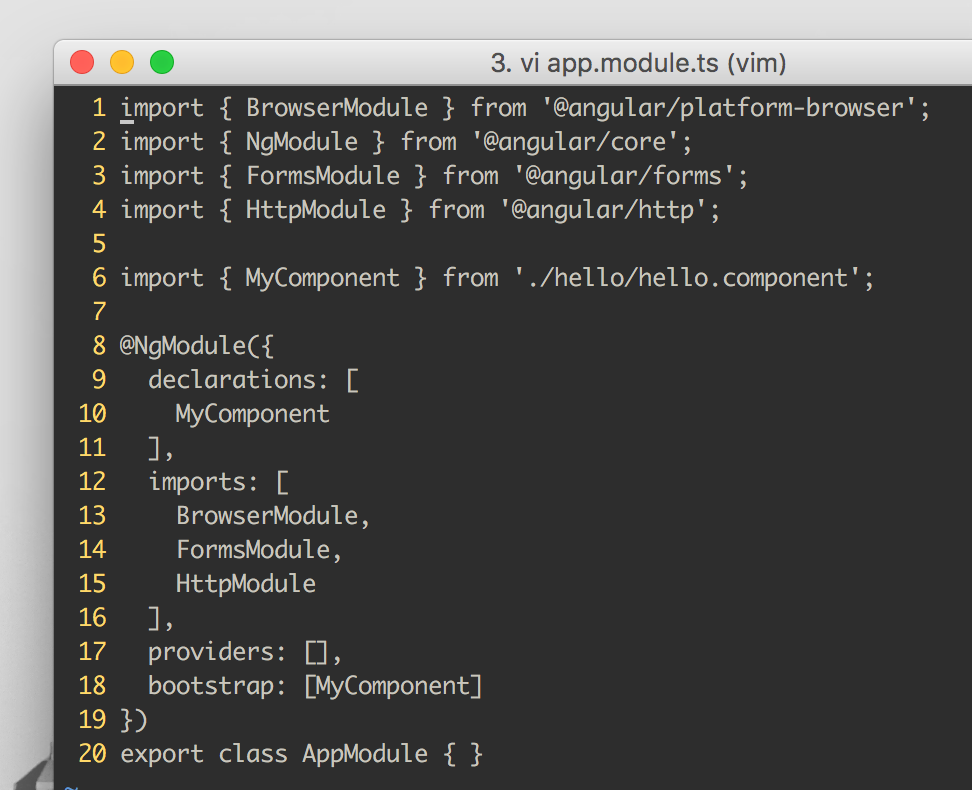
그 다음 컨포넌트를 모듈에 등록해주기 위해서 /프로젝트명/src/app/app.module.ts를 열어주고,
import { MyComponent } from ‘./hello/hello.component’; 를 추가 시켜주고,
declarations와 bootstrap 부분에 MyComponent를 등록해줍니다.
[app.module.ts]
import { BrowserModule } from '@angular/platform-browser';
import { NgModule } from '@angular/core';
import { FormsModule } from '@angular/forms';
import { HttpModule } from '@angular/http';

import { MyComponent } from './hello/hello.component';

@NgModule({
  declarations: [
    MyComponent
  ],
  imports: [
    BrowserModule,
    FormsModule,
    HttpModule
  ],
  providers: [],
  bootstrap: [MyComponent]
})
export class AppModule { }
[Screenshot]
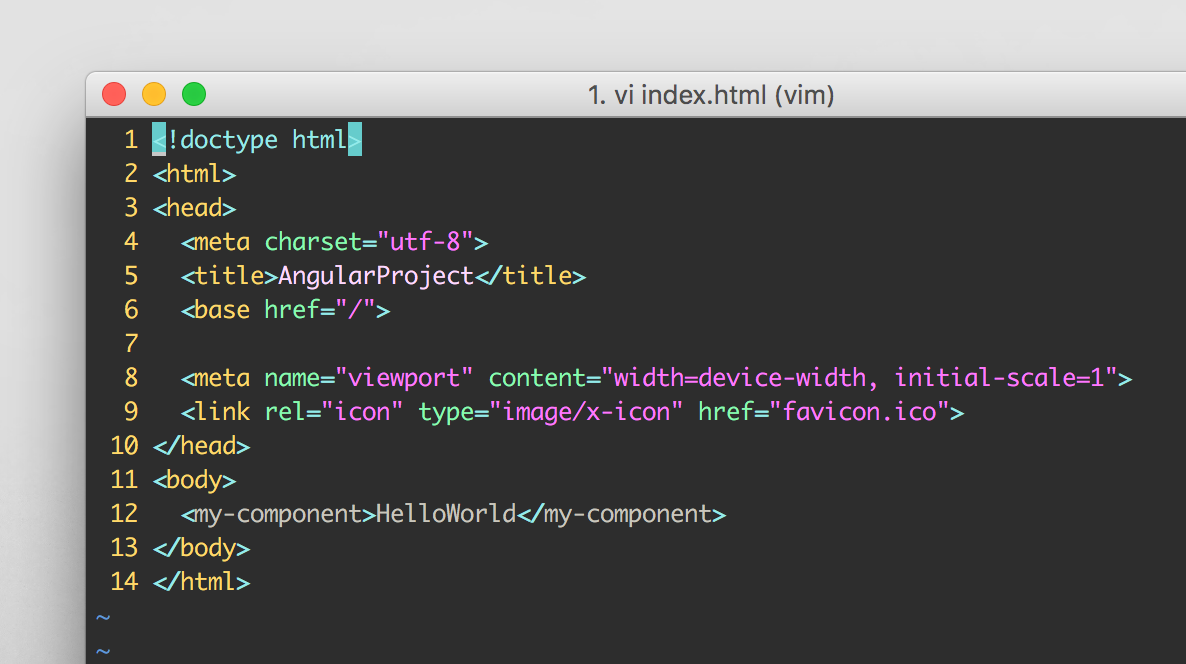
마지막으로
프로젝트명 /src/index.html 에 지정한 커스텀 엘리먼트(my-component)를 넣어줍니다.
[index.html]
<!doctype html>
<html>
<head>
  <meta charset="utf-8">
  <title>AngularProject</title>
  <base href="/">

  <meta name="viewport" content="width=device-width, initial-scale=1">
  <link rel="icon" type="image/x-icon" href="favicon.ico">
</head>
<body>
  <my-component>HelloWorld</my-component>
</body>
</html>
[Screenshot]
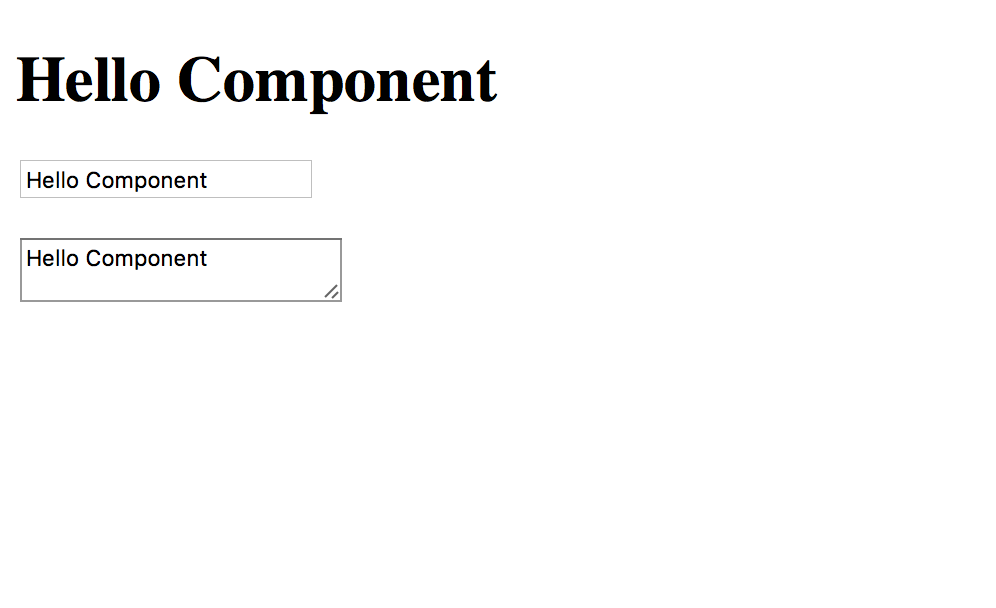
그리고
$ ng serve
를 이용하여 서버를 실행시키면 Compile이 되고 다음과 같은 화면이 Browser를 통해 나타나게 됩니다.