최근 개인적으로 이직을 하고 급하게 프로젝트를 진행하느라 장시간 포스팅이 소홀해졌는데, 프로젝트도 막바지이고 프로젝트를 진행하면서 알게된 삽질(?)을 공유하고자 포스팅을 다시 시작하려고 합니다.
오늘 포스팅할 내용은 RecyclerView를 매번 만들때 ViewHolder와 Adapter를 만드는게 귀찮아서 BaseRecyclerView를 따로 만들어서 사용했던 경험을 공유해보고자 합니다.
실제 아래 이미지와 같이 Adapter 생성 코드가 확 줄어드는 것을 확인할 수 있습니다. 한 두개 면 모르겠지만 여러개의 Adapter가 필요한 프로젝트에서는 매번 생성해야하는 코드가 이만큼 줄어듦으로써 많은 양의 코드를 줄일 수 있습니다.
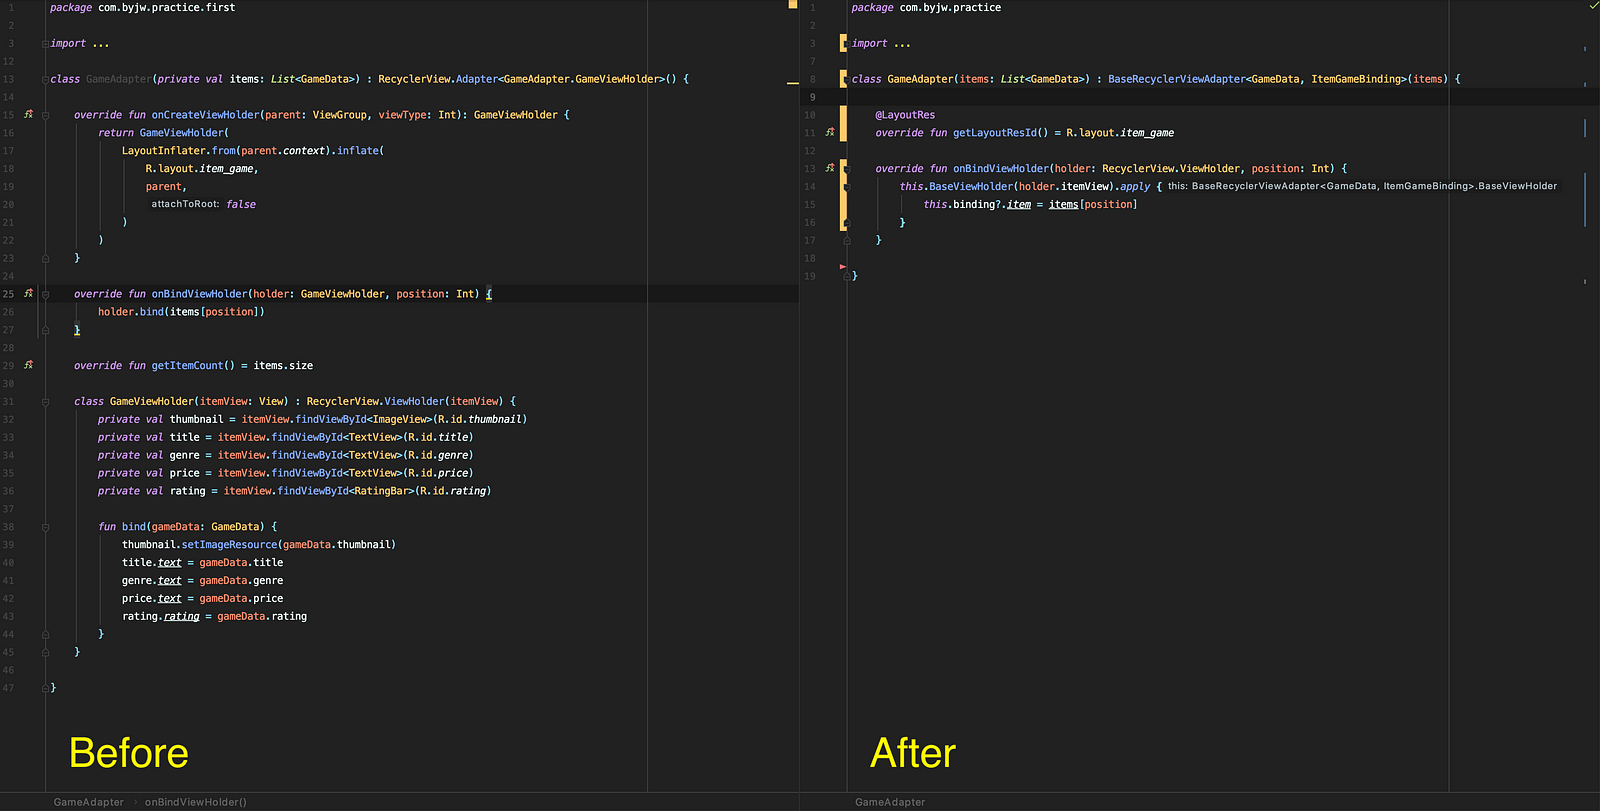
실제 소스는 BaseAdapterSample에 올렸습니다.
보통 RecyclerView Adapter를 만드는 방식
먼저 RecyclerView의 기본적인 사용 방법을 먼저 보고 BaseRecyclerViewAdapter를 만들고 어떻게 바뀌는지를 보고자 합니다.
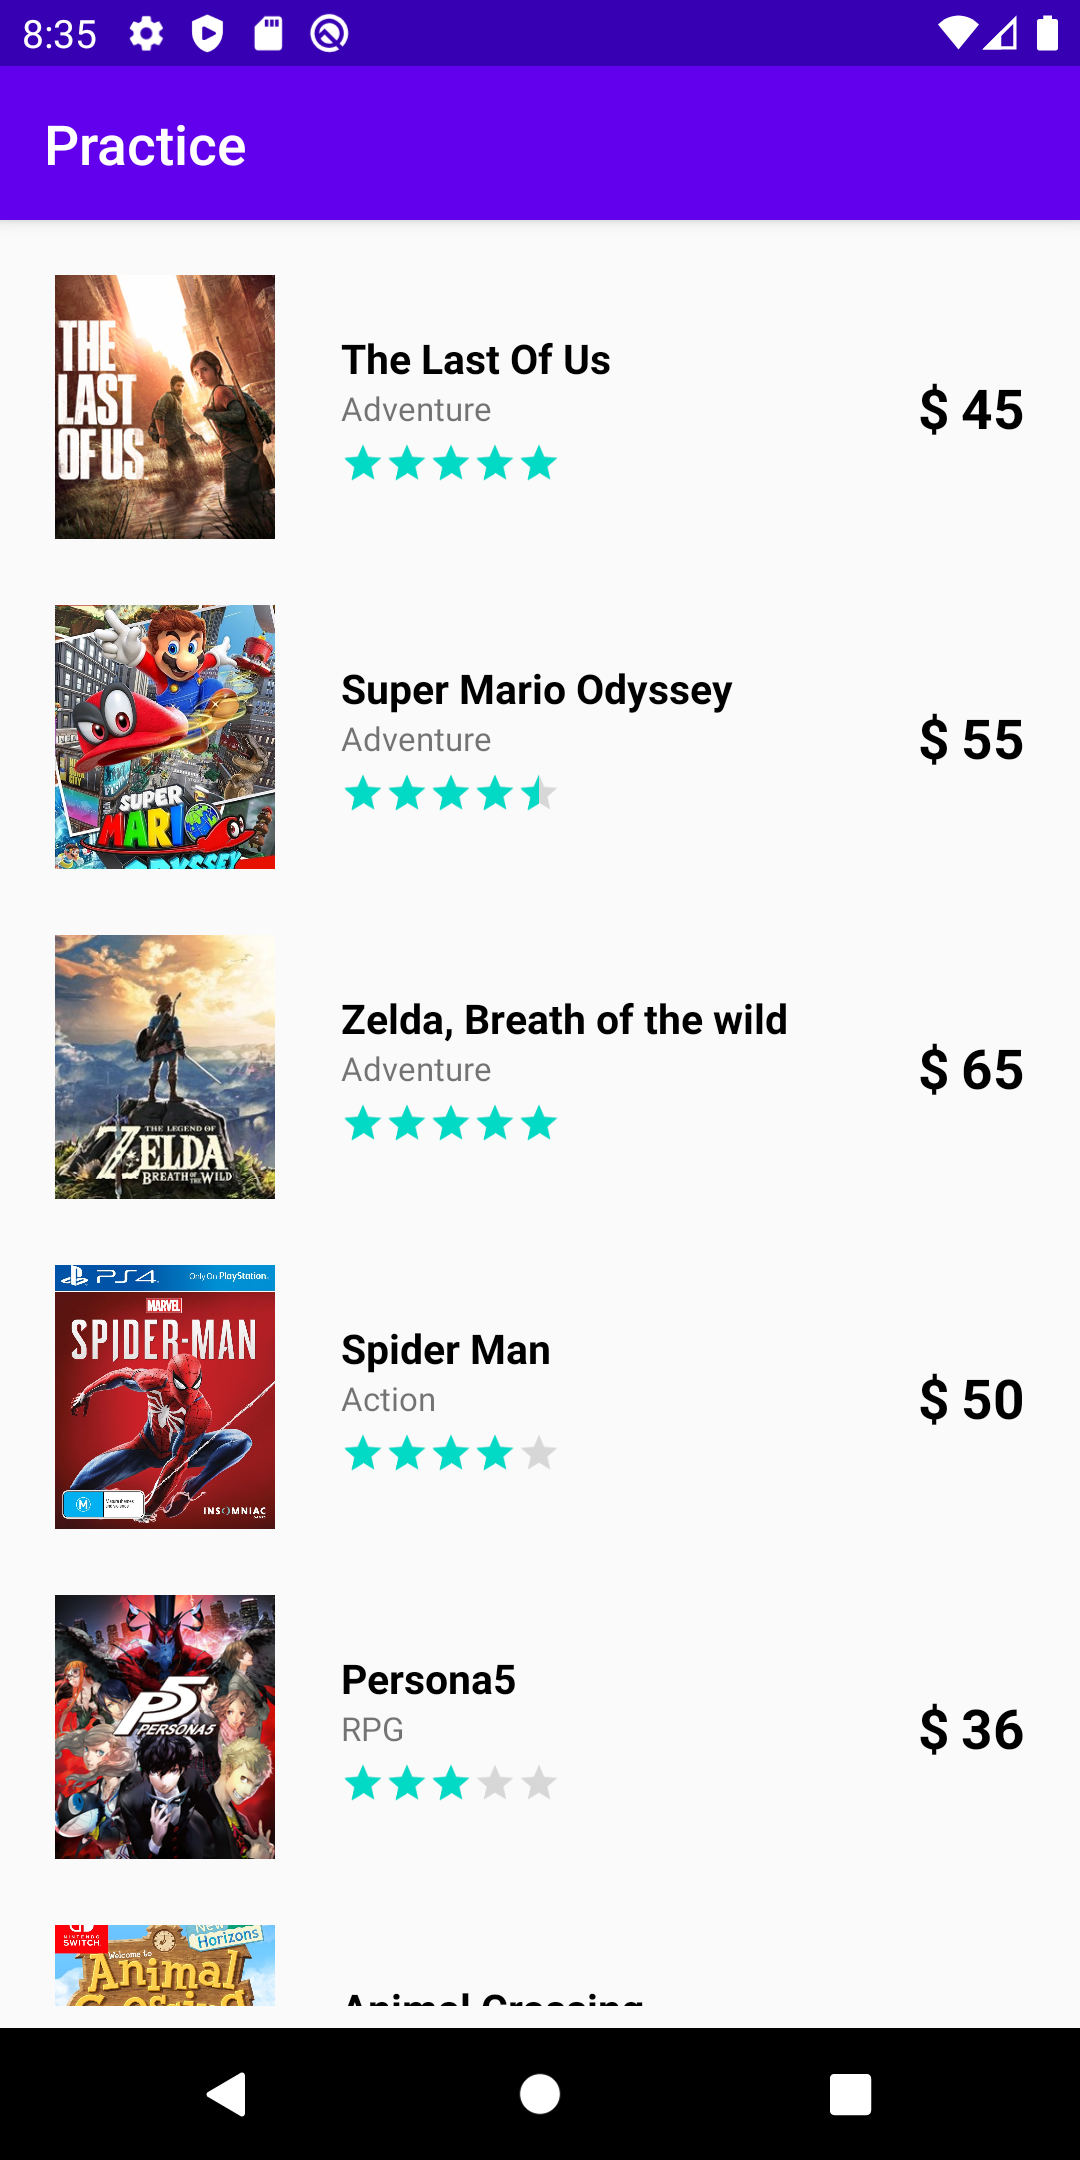
먼저 MainActivity.kt 에서 RecyclerView에 더미 데이터를 넣어서 넣는 부분입니다.
package com.byjw.practice

import androidx.appcompat.app.AppCompatActivity
import android.os.Bundle
import kotlinx.android.synthetic.main.activity_main.*

class  MainActivity : AppCompatActivity() {
    override fun onCreate(savedInstanceState: Bundle?) {
        super.onCreate(savedInstanceState)
        setContentView(R.layout.activity_main)

        val list = this.game_list

        // 더미 데이터
        val items = mutableListOf<GameData>().apply {
            this.add(GameData("The Last Of Us", "Adventure", R.drawable.the_last_of_us, "45", 5.0f))
            this.add(GameData("Super Mario Odyssey", "Adventure", R.drawable.mario, "55", 4.5f))
            this.add(GameData("Zelda, Breath of the wild", "Adventure", R.drawable.zelda, "65", 5.0f))
            this.add(GameData("Spider Man", "Action", R.drawable.spider_man, "50", 4.0f))
            this.add(GameData("Persona5", "RPG", R.drawable.persona, "36", 3.0f))
            this.add(GameData("Animal Crossing", "Life", R.drawable.animal_crossing, "60", 4.5f))
            this.add(GameData("Pokemon Let's go Pikachu", "RPG", R.drawable.pokemon, "52", 3.0f))
        }

        list.adapter = GameAdapter(items)

    }
}
activity_main.xml 레이아웃은 아래와 같이 만들었습니다. 단순히 RecyclerView가 있는 형태입니다.
<?xml version="1.0" encoding="utf-8"?>
<androidx.constraintlayout.widget.ConstraintLayout
    xmlns:android="http://schemas.android.com/apk/res/android"
    xmlns:app="http://schemas.android.com/apk/res-auto"
    xmlns:tools="http://schemas.android.com/tools"
    android:layout_width="match_parent"
    android:layout_height="match_parent"
    tools:context=".MainActivity">

    <androidx.recyclerview.widget.RecyclerView
        android:id="@+id/game_list"
        android:layout_width="0dp"
        android:layout_height="0dp"
        android:padding="8dp"
        android:orientation="vertical"
        app:layout_constraintBottom_toBottomOf="parent"
        app:layout_constraintLeft_toLeftOf="parent"
        app:layout_constraintRight_toRightOf="parent"
        app:layout_constraintTop_toTopOf="parent"
        app:layoutManager="androidx.recyclerview.widget.LinearLayoutManager" />

</androidx.constraintlayout.widget.ConstraintLayout>
먼저 ViewHolder로 전달받은 데이터를 레이아웃과 연결하는 부분입니다. (* 이 부분이 공통으로 빠지는 부분입니다.)
package com.byjw.practice

import android.view.View
import android.widget.ImageView
import android.widget.RatingBar
import android.widget.TextView
import androidx.recyclerview.widget.RecyclerView

class GameViewHolder(itemView: View) : RecyclerView.ViewHolder(itemView) {
    private val thumbnail = itemView.findViewById<ImageView>(R.id.thumbnail)
    private val title = itemView.findViewById<TextView>(R.id.title)
    private val genre = itemView.findViewById<TextView>(R.id.genre)
    private val price = itemView.findViewById<TextView>(R.id.price)
    private val rating = itemView.findViewById<RatingBar>(R.id.rating)

    fun bind(gameData: GameData) {
        thumbnail.setImageResource(gameData.thumbnail)
        title.text = gameData.title
        genre.text = gameData.genre
        price.text = gameData.price
        rating.rating = gameData.rating
    }
}
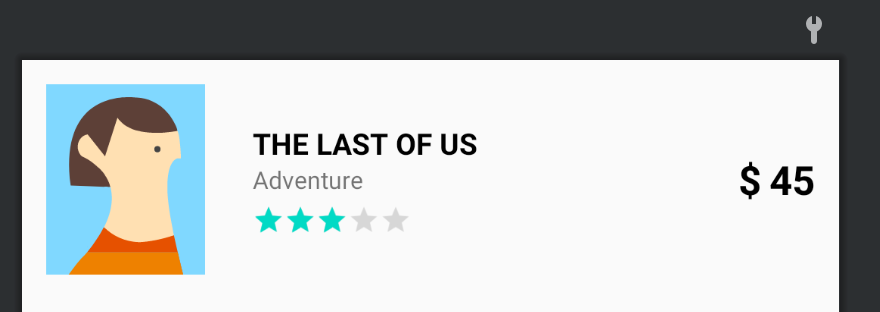
아래는 item_game.xml로 아래와 같은 레이아웃을 잡았습니다.
<?xml version="1.0" encoding="utf-8"?>
<androidx.constraintlayout.widget.ConstraintLayout
    xmlns:android="http://schemas.android.com/apk/res/android"
    xmlns:app="http://schemas.android.com/apk/res-auto"
    xmlns:tools="http://schemas.android.com/tools"
    android:layout_width="match_parent"
    android:layout_height="120dp"
    android:padding="12dp">


    <ImageView
        android:id="@+id/thumbnail"
        android:layout_width="80dp"
        android:layout_height="100dp"
        android:scaleType="centerCrop"
        app:layout_constraintBottom_toBottomOf="parent"
        app:layout_constraintStart_toStartOf="parent"
        app:layout_constraintTop_toTopOf="parent"
        tools:srcCompat="@tools:sample/avatars" />


    <LinearLayout
        android:id="@+id/linearLayout"
        android:layout_width="wrap_content"
        android:layout_height="wrap_content"
        android:layout_marginStart="24dp"
        android:orientation="vertical"
        app:layout_constraintBottom_toBottomOf="@+id/thumbnail"
        app:layout_constraintStart_toEndOf="@+id/thumbnail"
        app:layout_constraintTop_toTopOf="@+id/thumbnail">

        <TextView
            android:id="@+id/title"
            android:layout_width="wrap_content"
            android:layout_height="wrap_content"
            android:textColor="#000"
            android:textSize="15sp"
            android:textStyle="bold"
            tools:text="THE LAST OF US" />

        <TextView
            android:id="@+id/genre"
            android:layout_width="wrap_content"
            android:layout_height="wrap_content"
            android:textSize="12sp"
            tools:text="Adventure" />

        <RatingBar
            android:id="@+id/rating"
            style="@style/Widget.AppCompat.RatingBar.Small"
            android:layout_width="wrap_content"
            android:layout_height="wrap_content"
            android:layout_marginTop="4dp"
            android:rating="3" />

    </LinearLayout>

    <TextView
        android:id="@+id/price"
        android:layout_width="wrap_content"
        android:layout_height="wrap_content"
        android:textColor="#000"
        android:textSize="20sp"
        android:textStyle="bold"
        app:layout_constraintBottom_toBottomOf="@+id/linearLayout"
        app:layout_constraintEnd_toEndOf="parent"
        app:layout_constraintTop_toTopOf="@+id/linearLayout"
        tools:text="45" />

    <TextView
        android:id="@+id/unit"
        android:layout_width="wrap_content"
        android:layout_height="wrap_content"
        android:textColor="#000"
        android:textSize="20sp"
        android:textStyle="bold"
        android:layout_marginEnd="4dp"
        android:text="$"
        app:layout_constraintBottom_toBottomOf="@+id/price"
        app:layout_constraintEnd_toStartOf="@+id/price"
        app:layout_constraintTop_toTopOf="@+id/price"
        tools:text="$" />


</androidx.constraintlayout.widget.ConstraintLayout>
그 다음은 Adapter 부분입니다. (* 이 부분이 공통으로 빠지는 부분입니다.)
package com.byjw.practice

import android.view.LayoutInflater
import android.view.ViewGroup
import androidx.recyclerview.widget.RecyclerView

class GameAdapter(private val items: List<GameData>) : RecyclerView.Adapter<GameViewHolder>() {

    override fun onCreateViewHolder(parent: ViewGroup, viewType: Int): GameViewHolder {
        return GameViewHolder(
            LayoutInflater.from(parent.context).inflate(
                R.layout.item_game,
                parent,
                false
            )
        )
    }

    override fun onBindViewHolder(holder: GameViewHolder, position: Int) {
        holder.bind(items[position])
    }

    override fun getItemCount() = items.size
}
이때의 build.gradle(app)는 아래와 같습니다. 다음에는 데이터 바인딩을 쓸거라 차이를 보여주기 위해 넣었습니다.
apply plugin: 'com.android.application'
apply plugin: 'kotlin-android'
apply plugin: 'kotlin-android-extensions'

android {
    compileSdkVersion 29
    buildToolsVersion "29.0.3"

    defaultConfig {
        applicationId "com.byjw.practice"
        minSdkVersion 24
        targetSdkVersion 29
        versionCode 1
        versionName "1.0"

        testInstrumentationRunner "androidx.test.runner.AndroidJUnitRunner"
    }

    buildTypes {
        release {
            minifyEnabled false
            proguardFiles getDefaultProguardFile('proguard-android-optimize.txt'), 'proguard-rules.pro'
        }
    }
}

dependencies {
    implementation fileTree(dir: "libs", include: ["*.jar"])
    implementation "org.jetbrains.kotlin:kotlin-stdlib:$kotlin_version"
    implementation 'androidx.core:core-ktx:1.3.2'
    implementation 'androidx.appcompat:appcompat:1.2.0'
    implementation 'androidx.constraintlayout:constraintlayout:2.0.1'
    implementation 'androidx.recyclerview:recyclerview:1.1.0'
    testImplementation 'junit:junit:4.13'
    androidTestImplementation 'androidx.test.ext:junit:1.1.2'
    androidTestImplementation 'androidx.test.espresso:espresso-core:3.3.0'
}
BaseRecyclerView로 빼는 방식
우선 데이터 바인딩을 위해서 build.gradle(app) 에 아래 코드를 추가합니다.
// 데이터 바인딩 사용하기 위한 부분
buildFeatures {
    dataBinding = true
}
전체 소스는 다음과 같습니다.
apply plugin: 'com.android.application'
apply plugin: 'kotlin-android'
apply plugin: 'kotlin-kapt' // 이 부분 추가
apply plugin: 'kotlin-android-extensions'

android {
    compileSdkVersion 29
    buildToolsVersion "29.0.3"

    defaultConfig {
        applicationId "com.byjw.practice"
        minSdkVersion 24
        targetSdkVersion 29
        versionCode 1
        versionName "1.0"

        testInstrumentationRunner "androidx.test.runner.AndroidJUnitRunner"
    }

    buildTypes {
        release {
            minifyEnabled false
            proguardFiles getDefaultProguardFile('proguard-android-optimize.txt'), 'proguard-rules.pro'
        }
    }

    // 이 부분 추가 (데이터 바인딩 사용하기 위한 부분)
    buildFeatures {
        dataBinding = true
    }
}

dependencies {
    implementation fileTree(dir: "libs", include: ["*.jar"])
    implementation "org.jetbrains.kotlin:kotlin-stdlib:$kotlin_version"
    implementation 'androidx.core:core-ktx:1.3.2'
    implementation 'androidx.appcompat:appcompat:1.2.0'
    implementation 'androidx.constraintlayout:constraintlayout:2.0.1'
    implementation 'androidx.recyclerview:recyclerview:1.1.0'
    testImplementation 'junit:junit:4.13'
    androidTestImplementation 'androidx.test.ext:junit:1.1.2'
    androidTestImplementation 'androidx.test.espresso:espresso-core:3.3.0'
}
먼저 ViewHolder를 Base로 빼도록 하겠습니다.
package com.byjw.practice.base

import android.view.View
import androidx.databinding.DataBindingUtil
import androidx.databinding.ViewDataBinding
import androidx.recyclerview.widget.RecyclerView

abstract class BindingViewHolder<out T: ViewDataBinding>(view: View) : RecyclerView.ViewHolder(view) {
    val binding: T? = DataBindingUtil.bind(view)
}
기존에는 ViewHolder와 Adapter를 나눴는데, Adapter 안에 inner class로 넣도록 하겠습니다.
위에서 만들어 놓은 BindingViewHolder를 여기서 사용합니다.
package com.byjw.practice.base

import android.view.LayoutInflater
import android.view.View
import android.view.ViewGroup
import androidx.annotation.LayoutRes
import androidx.databinding.ViewDataBinding
import androidx.recyclerview.widget.RecyclerView

abstract class BaseRecyclerViewAdapter<T, VDB : ViewDataBinding>(var items: List<T>) :
    RecyclerView.Adapter<BaseRecyclerViewAdapter<T, VDB>.BaseViewHolder>() {

    @LayoutRes
    abstract fun getLayoutResId(): Int

    var binding: Any? = null

    override fun onCreateViewHolder(
        parent: ViewGroup,
        viewType: Int
    ): BaseRecyclerViewAdapter<T, VDB>.BaseViewHolder {
        return BaseViewHolder(
            LayoutInflater.from(parent.context).inflate(
                getLayoutResId(),
                parent,
                false
            )
        )
    }

    override fun getItemCount() = items.size

    inner class BaseViewHolder(view: View) : BindingViewHolder<VDB>(view)

}
실제로 Adapter를 만들기 전에 기존에 있던 item_game.xml을 데이터 바인딩으로 사용하기 위해 안쪽에 <layou> </layout> 으로 감싸주고 <data>에
item 이란 이름으로 GameData를 넣어주었습니다.
<?xml version="1.0" encoding="utf-8"?>

<layout>

    <data>
        <variable name="item" type="com.byjw.practice.GameData" />
    </data>

    <androidx.constraintlayout.widget.ConstraintLayout
        xmlns:android="http://schemas.android.com/apk/res/android"
        xmlns:app="http://schemas.android.com/apk/res-auto"
        xmlns:tools="http://schemas.android.com/tools"
        android:layout_width="match_parent"
        android:layout_height="120dp"
        android:padding="12dp">


        <ImageView
            android:id="@+id/thumbnail"
            android:layout_width="80dp"
            android:layout_height="100dp"
            android:scaleType="centerCrop"
            app:src="@{item.thumbnail}"
            app:layout_constraintBottom_toBottomOf="parent"
            app:layout_constraintStart_toStartOf="parent"
            app:layout_constraintTop_toTopOf="parent"
            tools:srcCompat="@tools:sample/avatars" />


        <LinearLayout
            android:id="@+id/linearLayout"
            android:layout_width="wrap_content"
            android:layout_height="wrap_content"
            android:layout_marginStart="24dp"
            android:orientation="vertical"
            app:layout_constraintBottom_toBottomOf="@+id/thumbnail"
            app:layout_constraintStart_toEndOf="@+id/thumbnail"
            app:layout_constraintTop_toTopOf="@+id/thumbnail">

            <TextView
                android:id="@+id/title"
                android:layout_width="wrap_content"
                android:layout_height="wrap_content"
                android:textColor="#000"
                android:textSize="15sp"
                android:textStyle="bold"
                android:text="@{item.title}"
                tools:text="THE LAST OF US" />

            <TextView
                android:id="@+id/genre"
                android:layout_width="wrap_content"
                android:layout_height="wrap_content"
                android:textSize="12sp"
                android:text="@{item.genre}"
                tools:text="Adventure" />

            <RatingBar
                android:id="@+id/rating"
                style="@style/Widget.AppCompat.RatingBar.Small"
                android:layout_width="wrap_content"
                android:layout_height="wrap_content"
                android:layout_marginTop="4dp"
                android:rating="@{item.rating}" />

        </LinearLayout>

        <TextView
            android:id="@+id/price"
            android:layout_width="wrap_content"
            android:layout_height="wrap_content"
            android:textColor="#000"
            android:textSize="20sp"
            android:textStyle="bold"
            android:text="@{item.price}"
            app:layout_constraintBottom_toBottomOf="@+id/linearLayout"
            app:layout_constraintEnd_toEndOf="parent"
            app:layout_constraintTop_toTopOf="@+id/linearLayout"
            tools:text="45" />

        <TextView
            android:id="@+id/unit"
            android:layout_width="wrap_content"
            android:layout_height="wrap_content"
            android:textColor="#000"
            android:textSize="20sp"
            android:textStyle="bold"
            android:layout_marginEnd="4dp"
            android:text="$"
            app:layout_constraintBottom_toBottomOf="@+id/price"
            app:layout_constraintEnd_toStartOf="@+id/price"
            app:layout_constraintTop_toTopOf="@+id/price"
            tools:text="$" />


    </androidx.constraintlayout.widget.ConstraintLayout>
</layout>
대신 ImageView에 android:src를 데이터 바인딩으로 바로 해줄 수 없기 때문에 BindingAdapter를 만들어야 합니다.
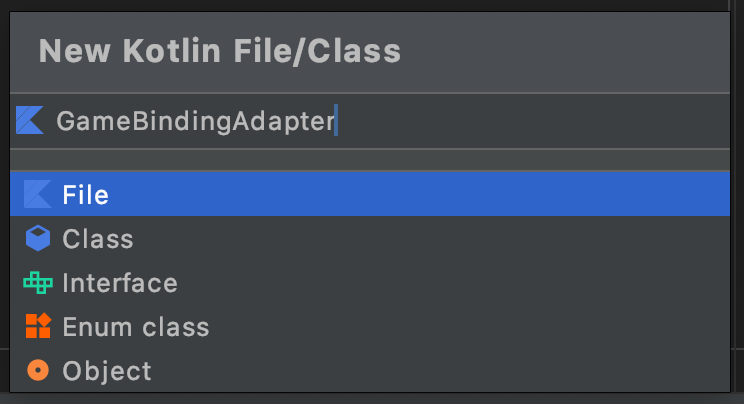
조심해야 하야 하는 부분이 아래 BindingAdapter를 만들때에는 class가 아닌 file로 생성합니다.
아래에서 만든 setThumbnail 함수가 위의 레이아웃에서 ImageView의 app:setThumbnail="@{item.thumbnail}" 부분으로 대체됩니다.
package com.byjw.practice

import android.widget.ImageView
import androidx.databinding.BindingAdapter

@BindingAdapter("setThumbnail")
fun ImageView.setThumbnail(thumbnail: Int) {
    this.setImageResource(thumbnail)
}
이제 실질적으로 바뀌는 부분입니다. 위에서 Base로 만들어 준 부분 때문에 항상 만들어 주던 ViewHolder와 onCreateViewHolder 부분을 매번 구현 안해줘도
되었습니다.
package com.byjw.practice

import androidx.annotation.LayoutRes
import androidx.recyclerview.widget.RecyclerView
import com.byjw.practice.base.BaseRecyclerViewAdapter
import com.byjw.practice.databinding.ItemGameBinding

class GameAdapter(items: List<GameData>) : BaseRecyclerViewAdapter<GameData, ItemGameBinding>(items) {

    @LayoutRes
    override fun getLayoutResId() = R.layout.item_game

    override fun onBindViewHolder(holder: RecyclerView.ViewHolder, position: Int) {
        holder.binding?.item = items[position]
    }
}
MainActivity.kt는 동일하게 갑니다.
package com.byjw.practice

import androidx.appcompat.app.AppCompatActivity
import android.os.Bundle
import kotlinx.android.synthetic.main.activity_main.*

class MainActivity : AppCompatActivity() {
    override fun onCreate(savedInstanceState: Bundle?) {
        super.onCreate(savedInstanceState)
        setContentView(R.layout.activity_main)

        val list = this.game_list

        // 더미 데이터
        val items = mutableListOf<GameData>().apply {
            this.add(GameData("The Last Of Us", "Adventure", R.drawable.the_last_of_us, "45", 5.0f))
            this.add(GameData("Super Mario Odyssey", "Adventure", R.drawable.mario, "55", 4.5f))
            this.add(GameData("Zelda, Breath of the wild", "Adventure", R.drawable.zelda, "65", 5.0f))
            this.add(GameData("Spider Man", "Action", R.drawable.spider_man, "50", 4.0f))
            this.add(GameData("Persona5", "RPG", R.drawable.persona, "36", 3.0f))
            this.add(GameData("Animal Crossing", "Life", R.drawable.animal_crossing, "60", 4.5f))
            this.add(GameData("Pokemon Let's go Pikachu", "RPG", R.drawable.pokemon, "52", 3.0f))
        }

        list.adapter = GameAdapter(items)

    }
}